
Digging into the firmware: Bash Script Jenga
For Part two we are going to look at the order in which the files are run, then look at what the system is doing. I have a particular interest in the QR code stuff and potentially the update stuff.
So, from part 1, we know the init scripts run the show on startup, let’s go back to them for now.
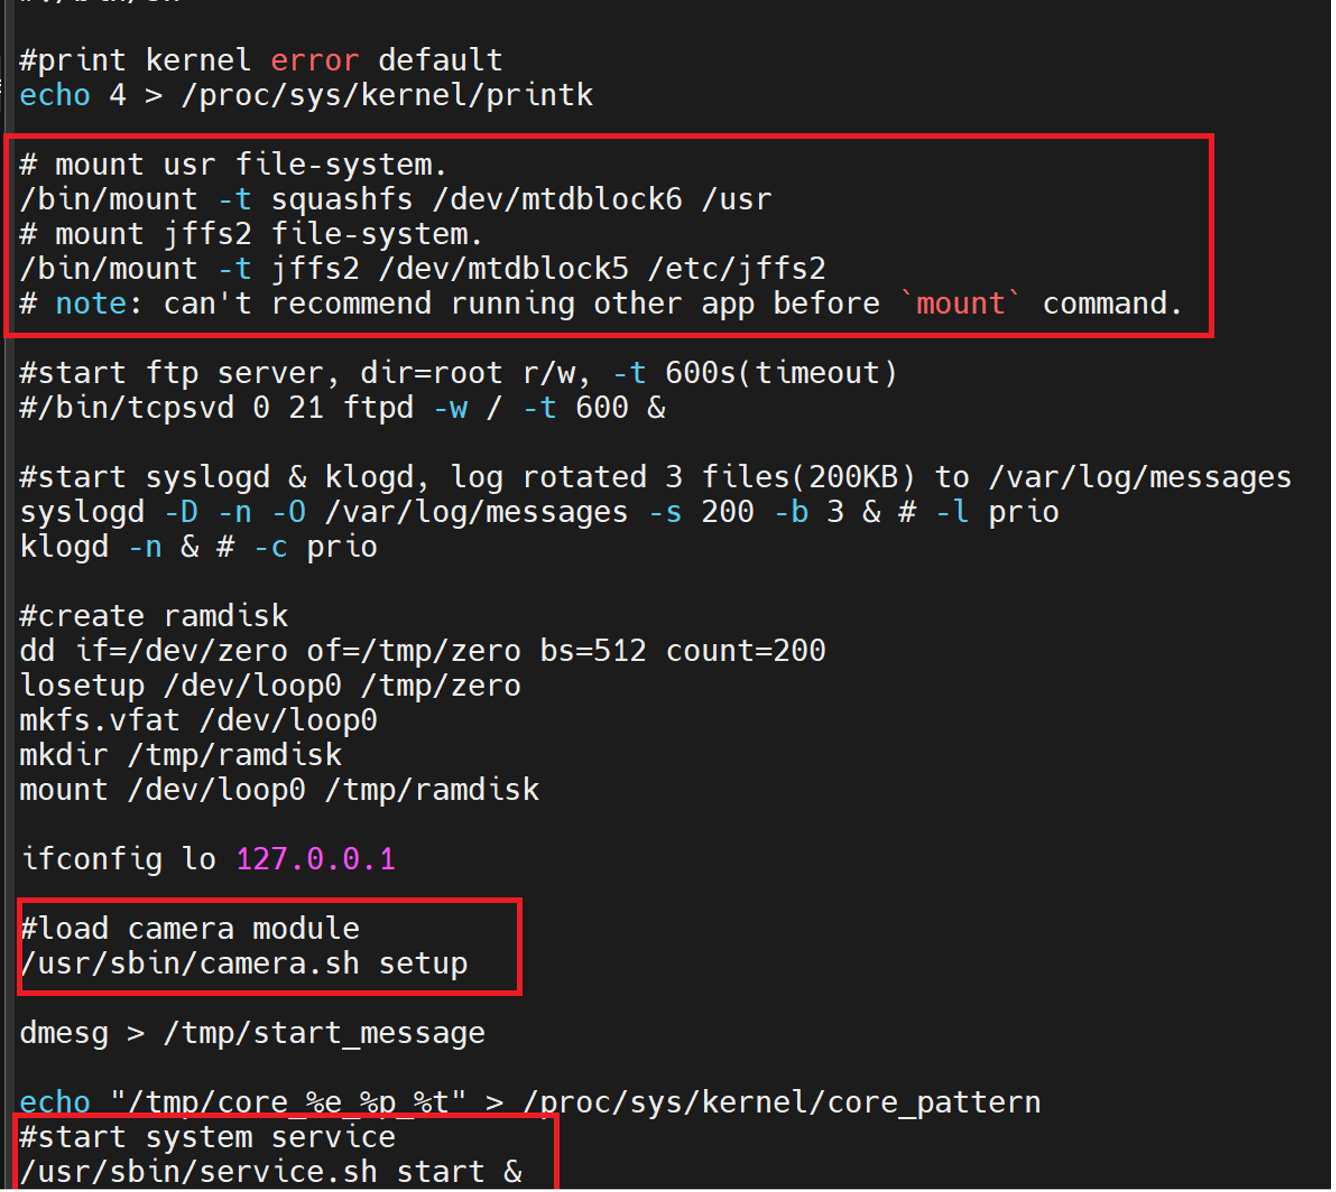
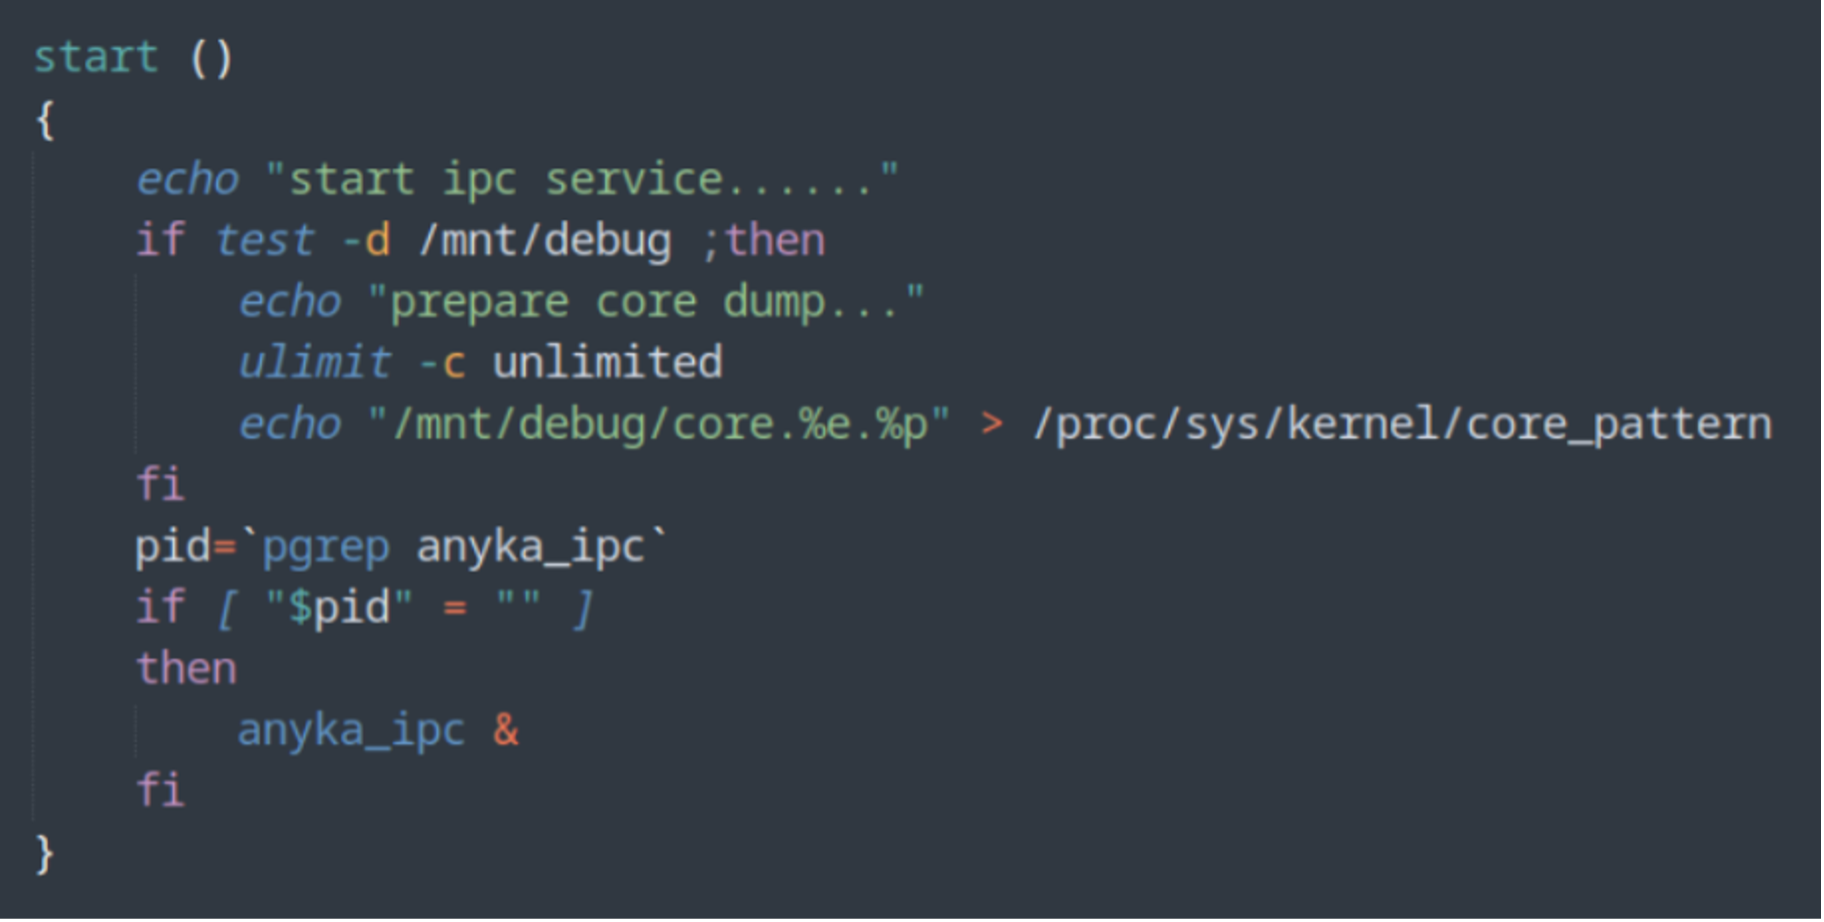
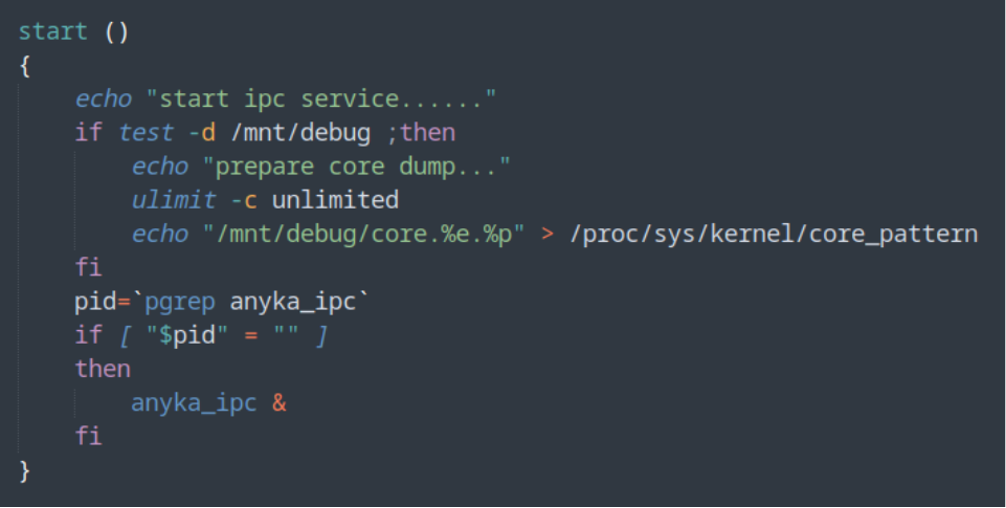
After the device does its mounting of filesystems, its “loads camera module”
Let’s have a look.
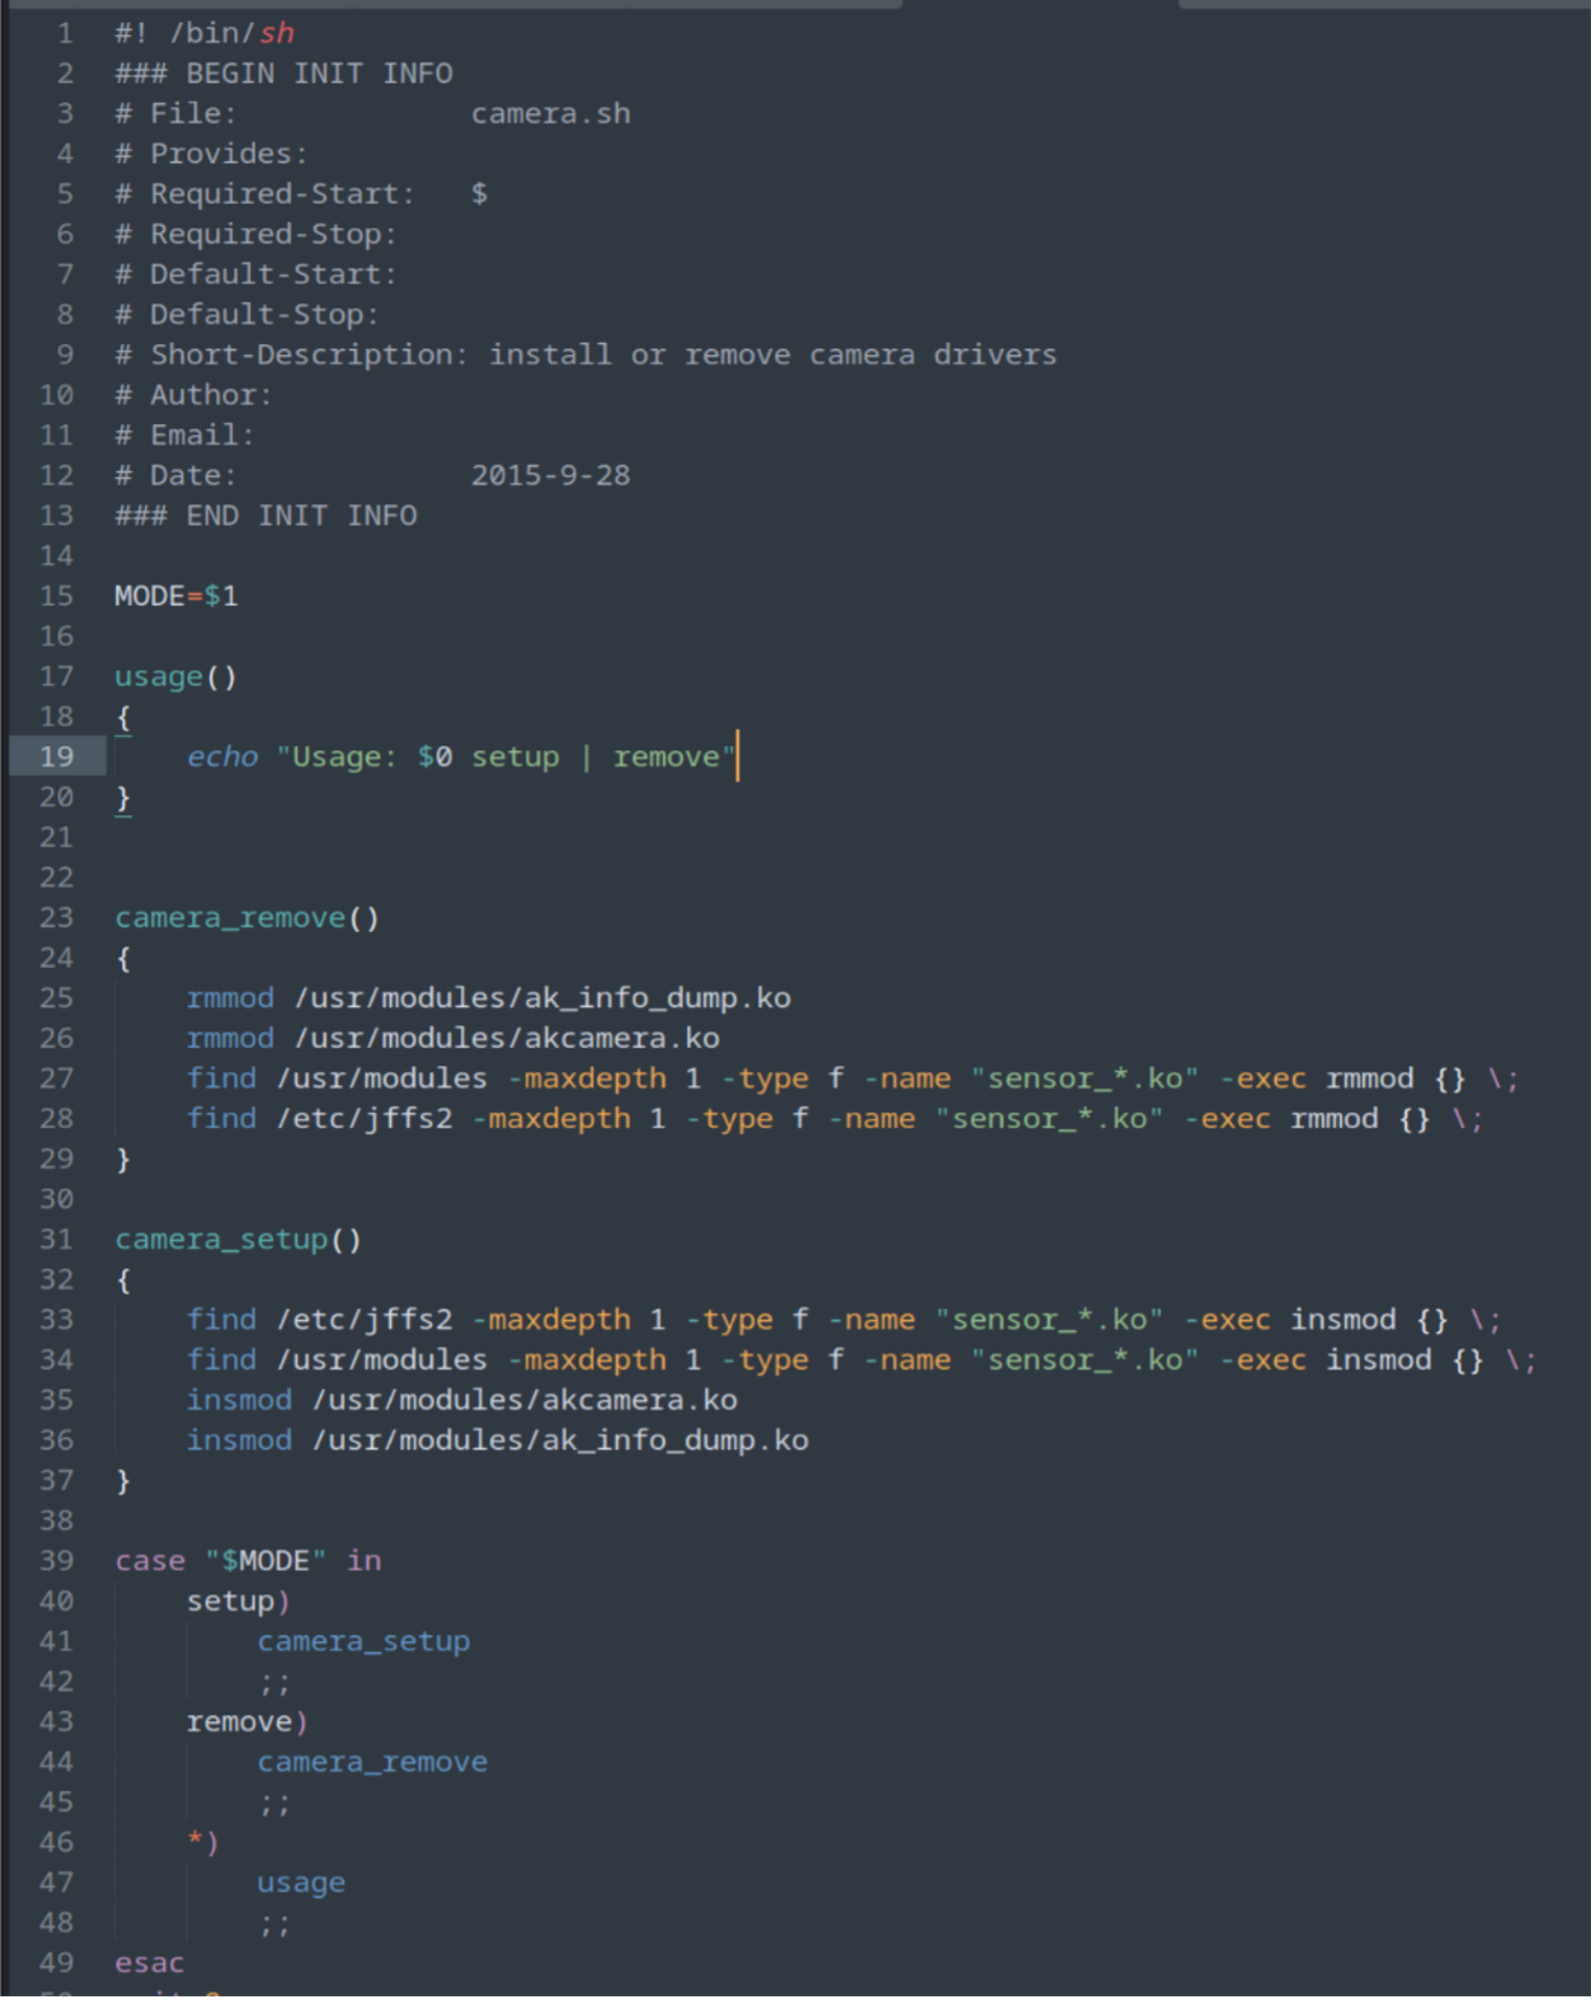
Well… that’s boring, but ok, let’s look at the service.sh file instead.

Ok better, but also a lot of crap. Since this script is pulling values from the anyka_ipc.config file and from the top of the bash script itself, we can look at the value and config file to see if any of those conditions are set and if there not, reduce the shell script to something meaningful.
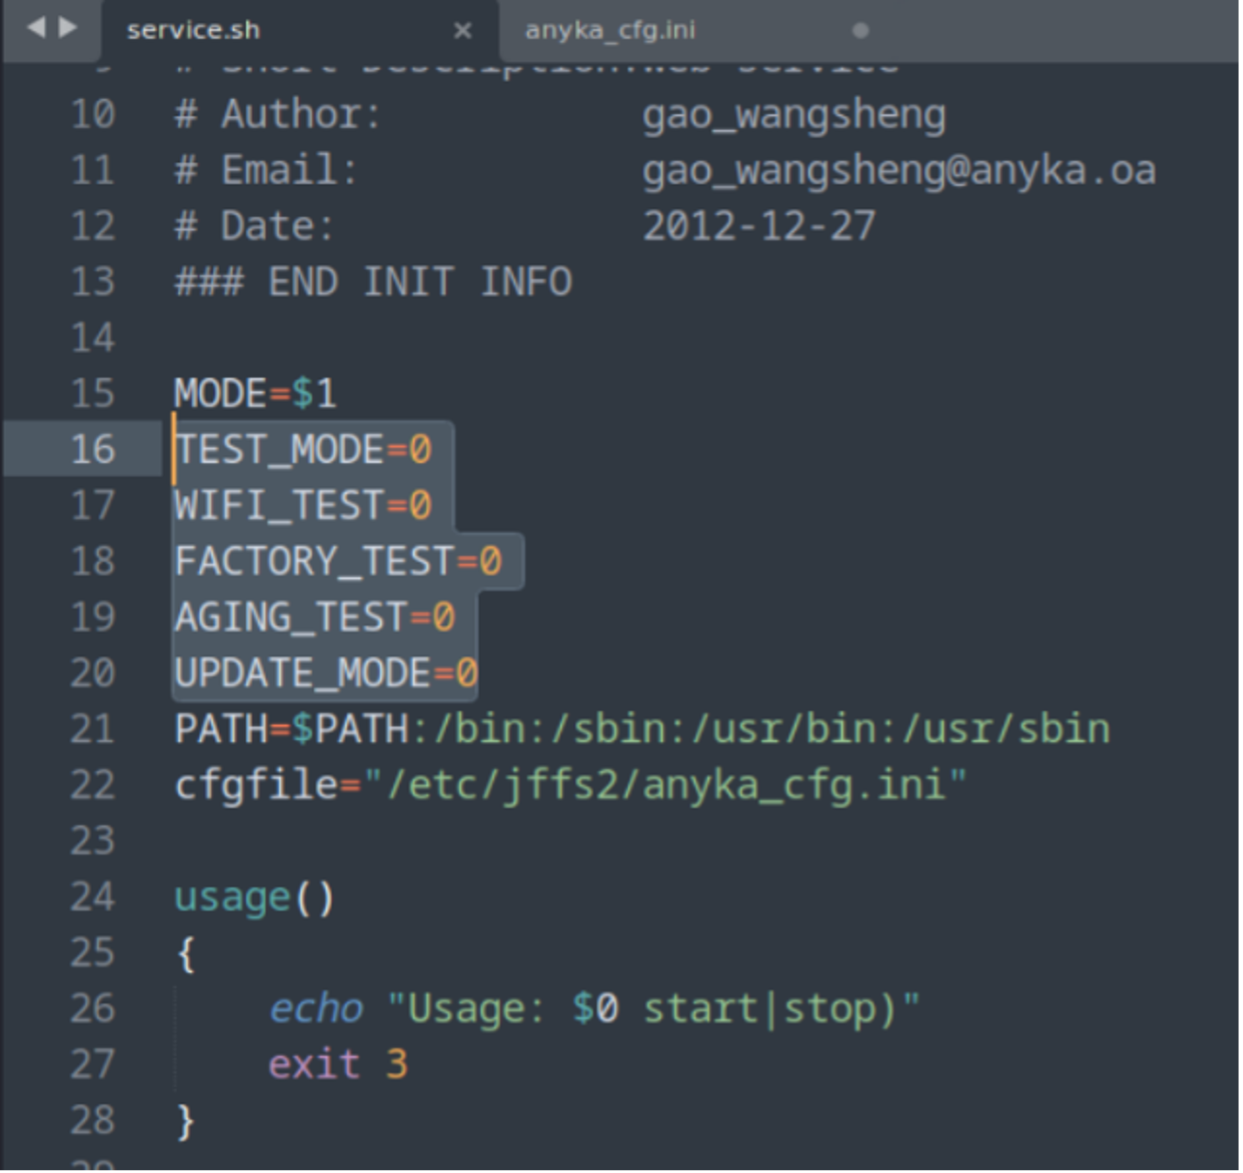
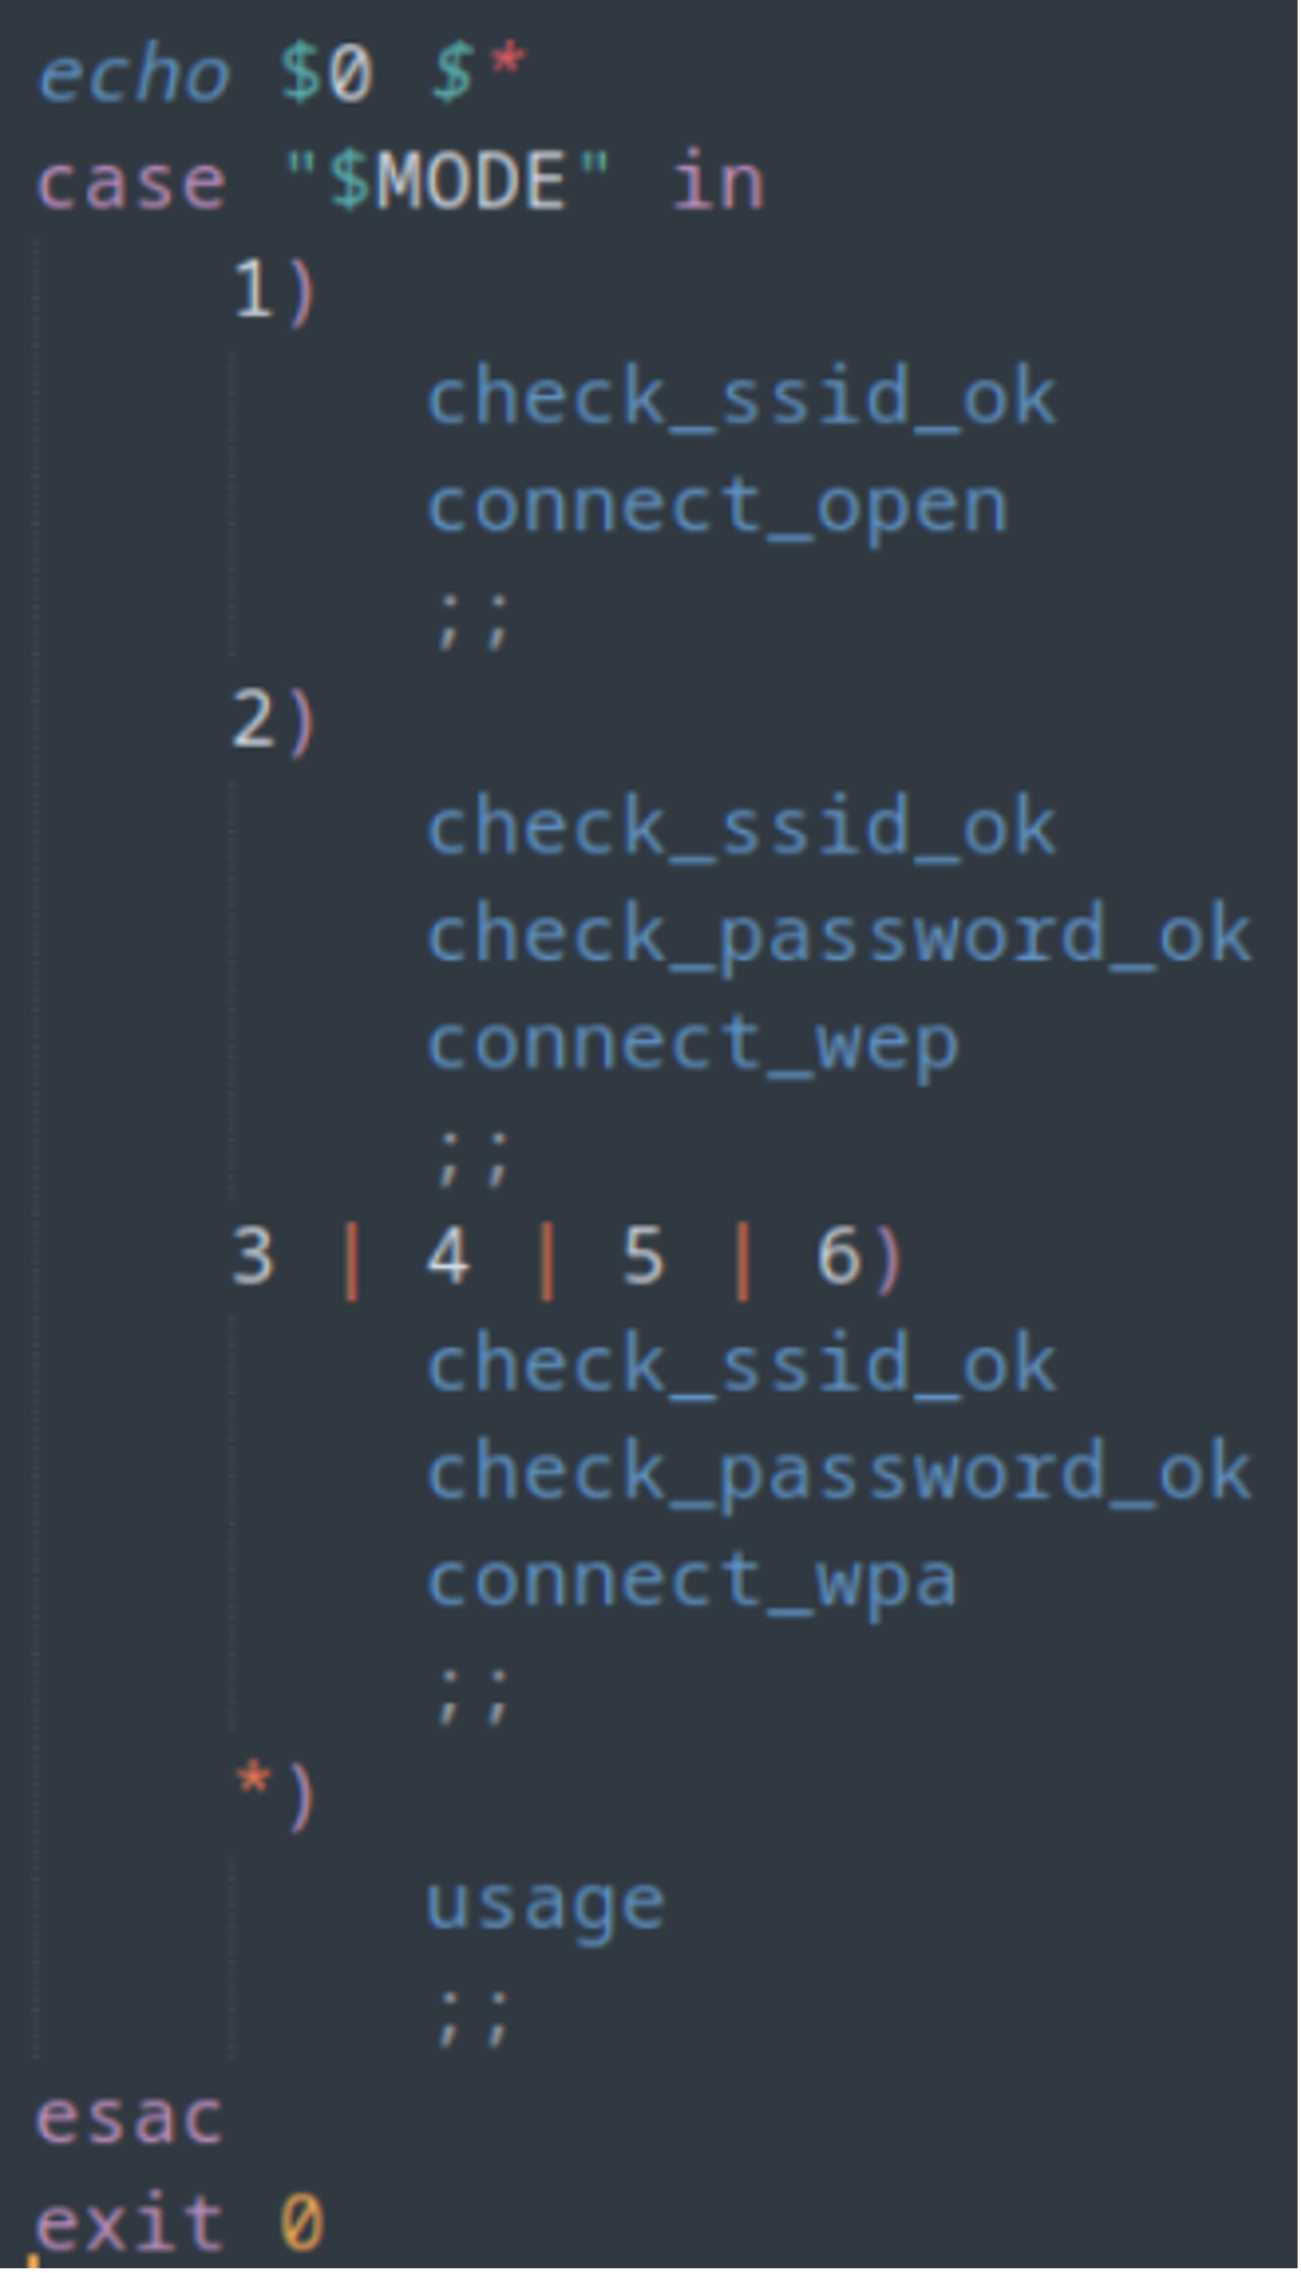
So, TEST_MODE, WIFI_TEST, FACTORY_TEST, AGING_TEST and UPDATE_MODE are all set to ZERO
Let’s tidy the script up!
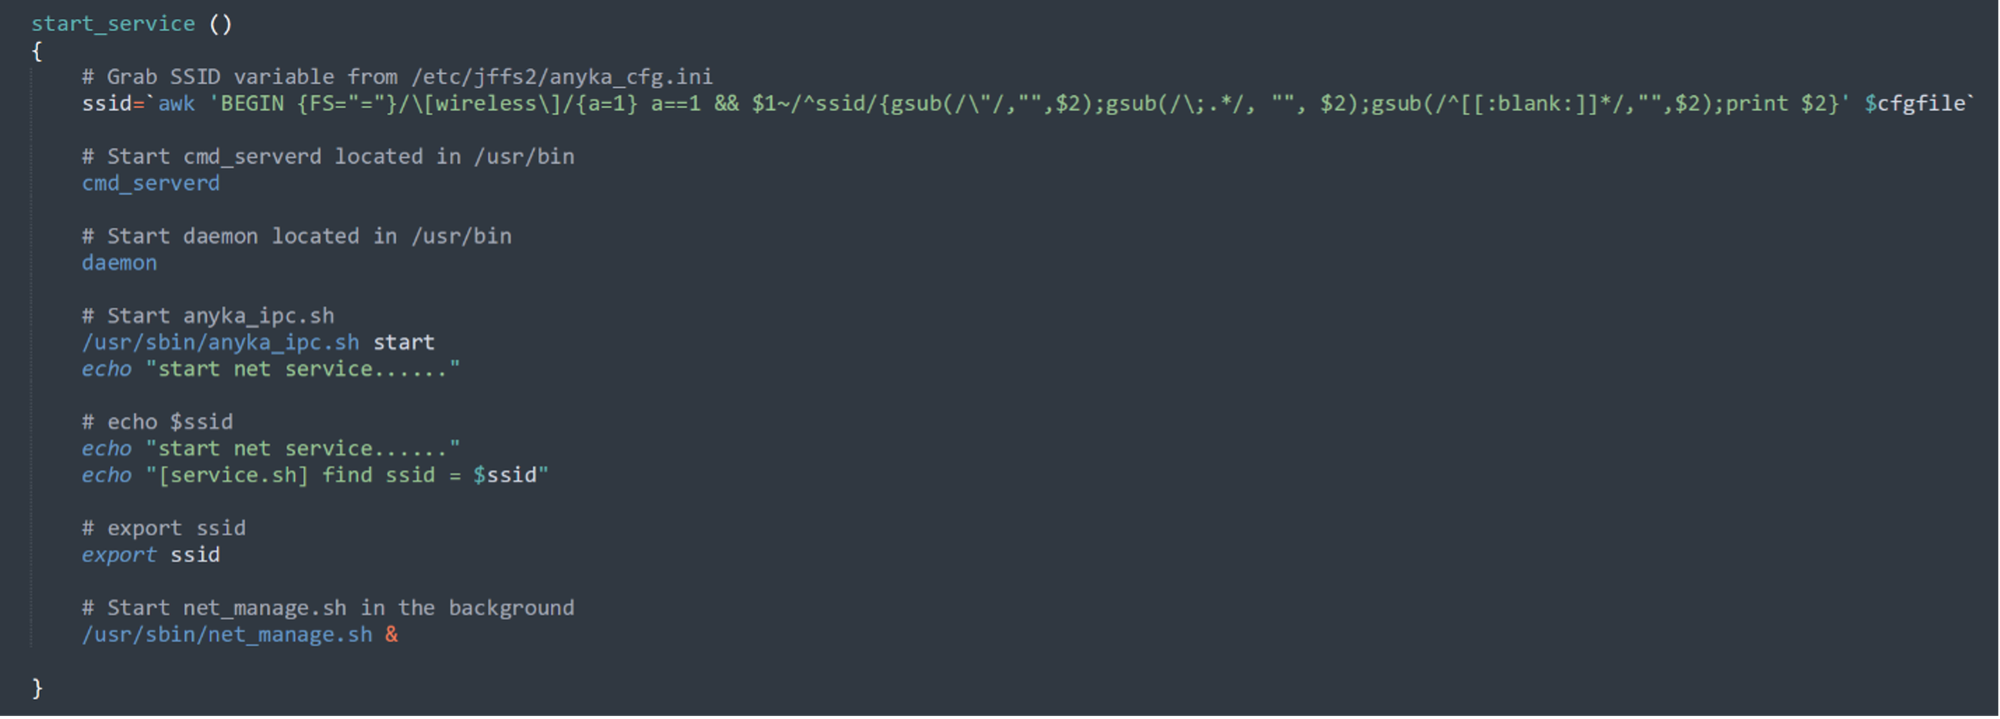
Let’s have a look at this ‘ssid’ command!
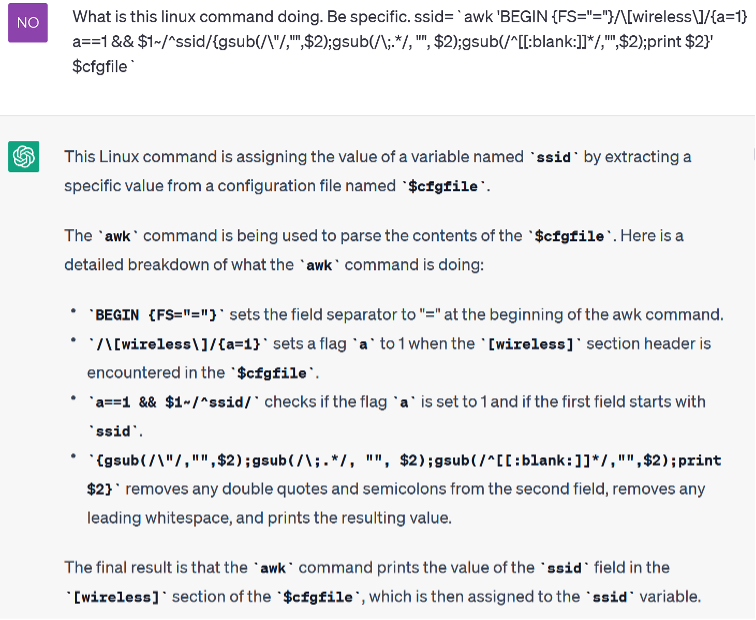
Well ok then, Thanks ChatGPT. (I could have done this manually, but ChatGPT exists and is perfect for these kind of things)
So bottom line, it gets the SSID var from the Config file and prints it out. Ok nice.
Next up the script starts cmd_serverd, daemon and anyka_ipc.sh and then starts net_manage.sh in the background.
we will carry on looking at the anyka_ipc.sh as it’s the easier option for now, but we will be coming back to the other services for sure.
BORING! (for now)
Ok let’s move on to the net_manage.sh.
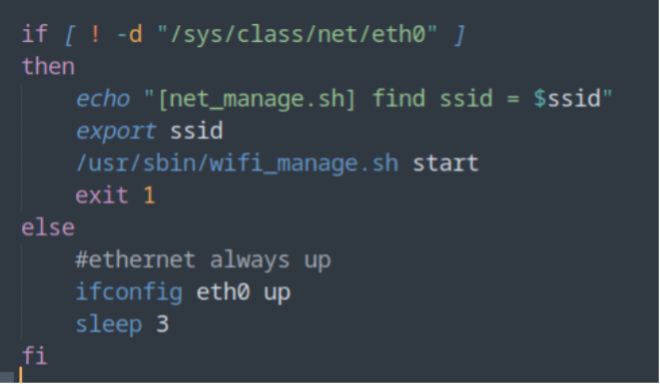
This script checks if the eth0 network interface is available, and if it is not, it starts another script to manage the wireless network connection. If the eth0 interface is available, the script brings it up.
NOTE: This device does not have an ethernet port.
So essentially, we chase these bash scripts until it does something!
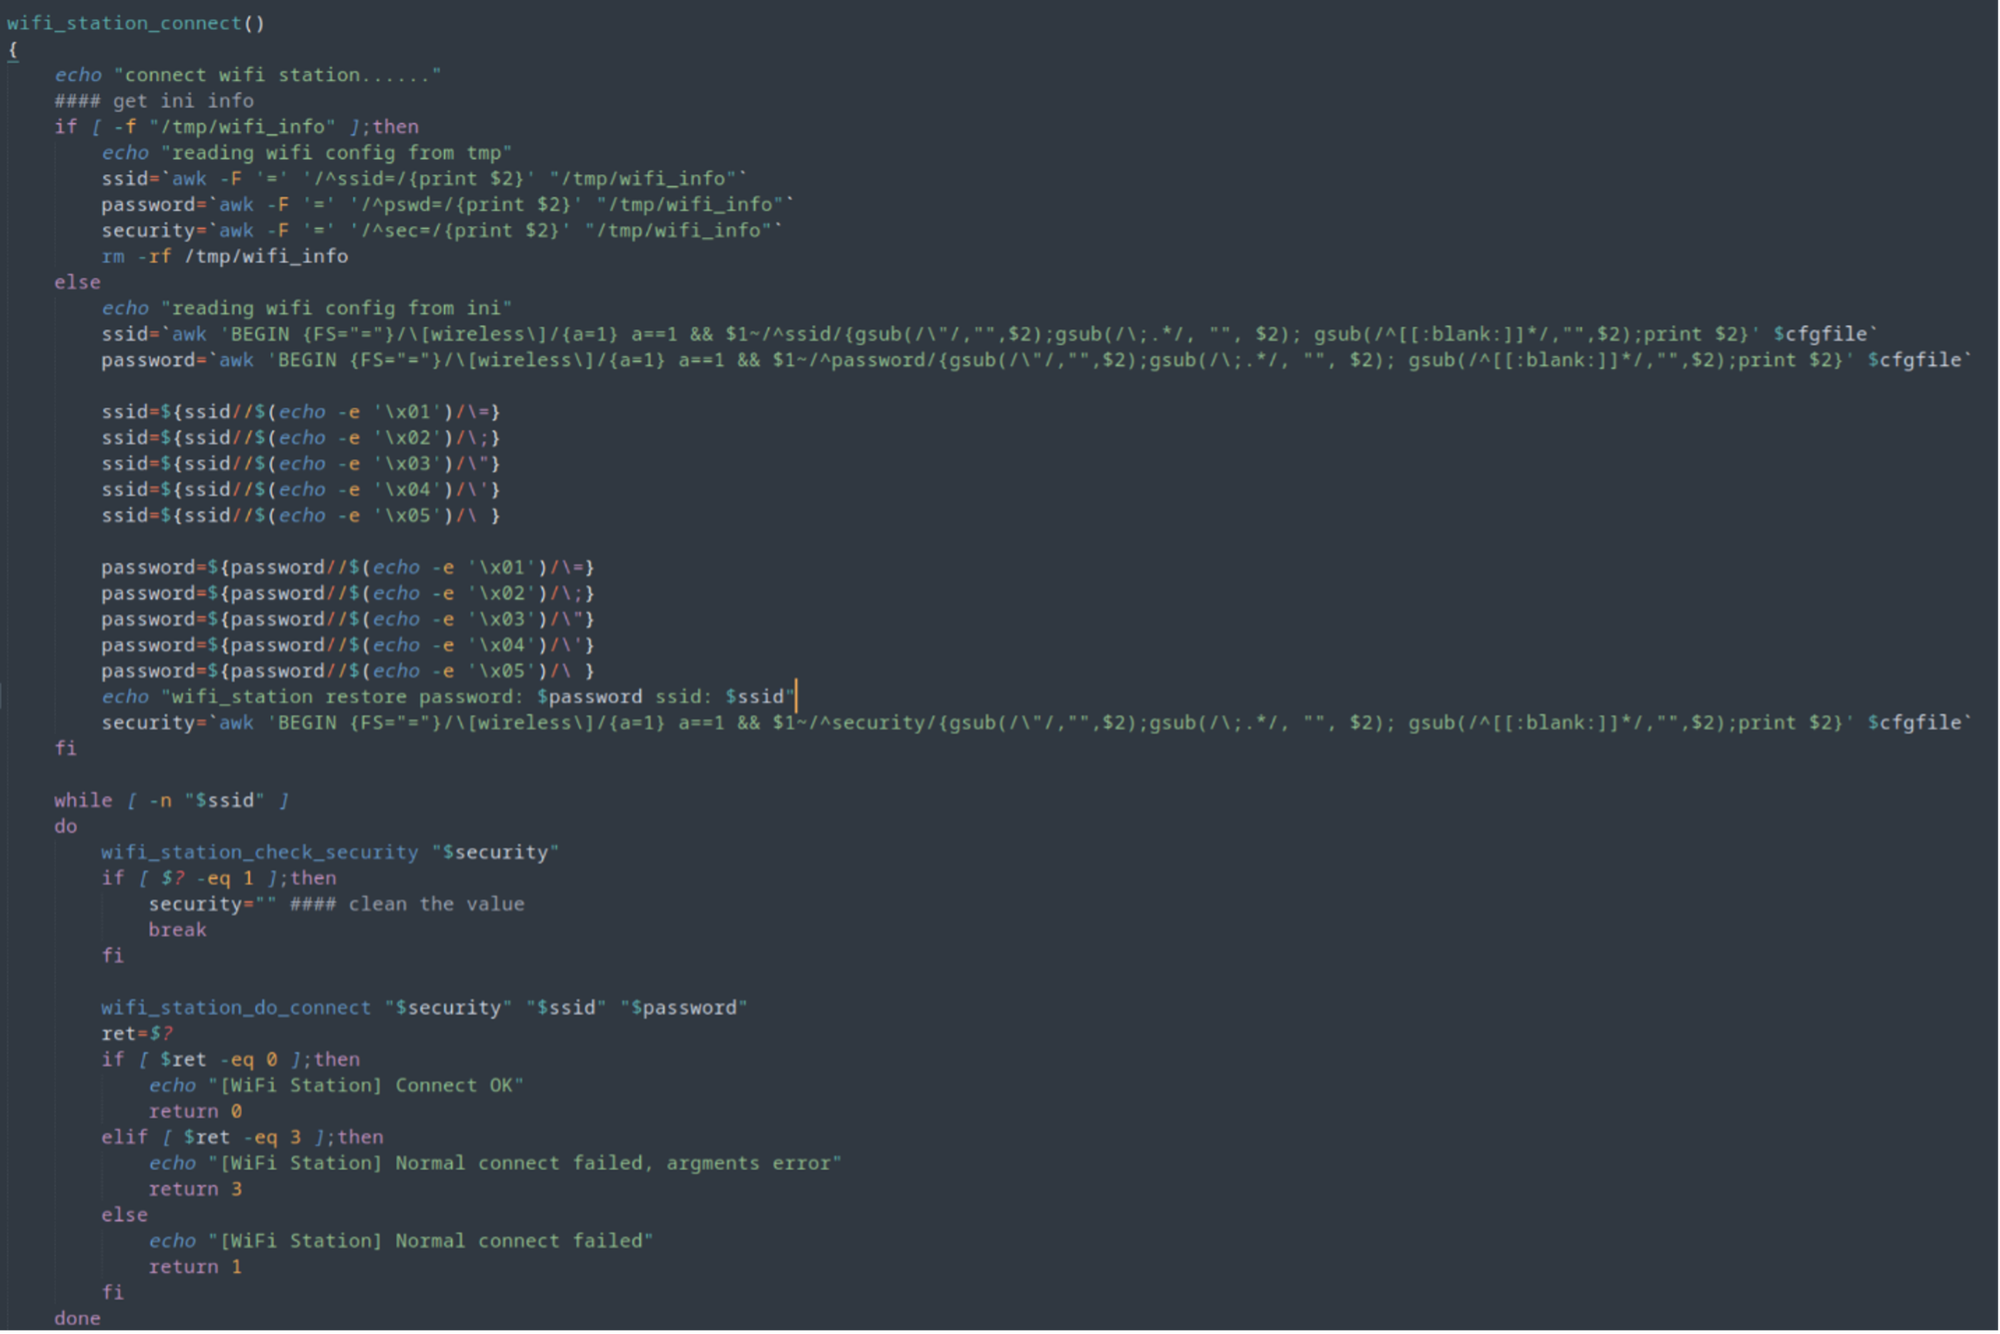
Let us break this down a little bit!
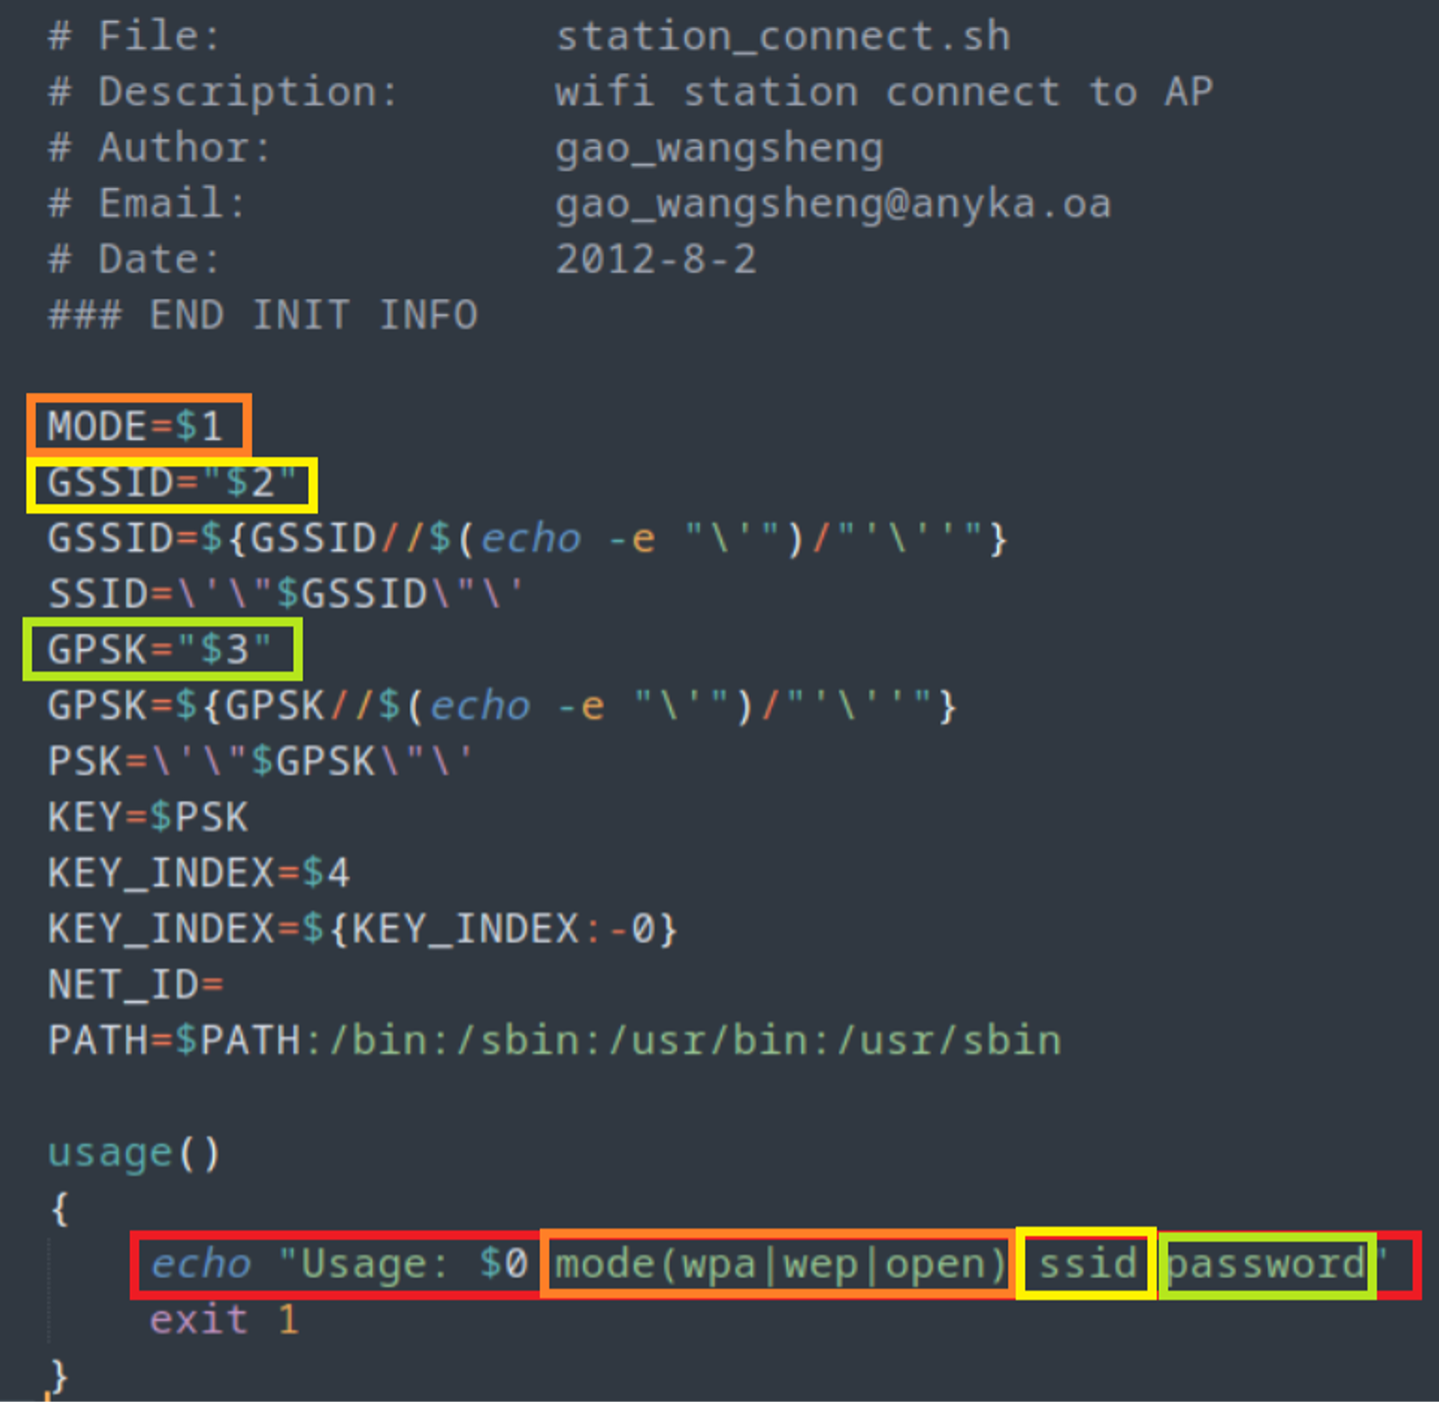
This is a Bash script that reads a Wi-Fi configuration from a temp file or an INI file, extracts the SSID, password, and security settings, and then passes these values to a function named wifi_station_do_connect.
The thing that catches my eyes here is the character substitution happening on the ssid and password before it is passed to another function.
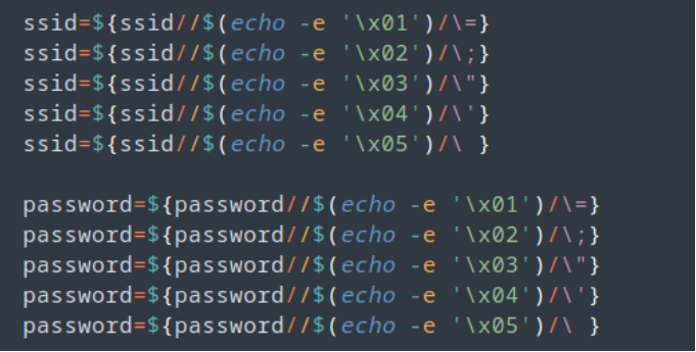
These few lines modify the ssid and password variables to replace certain escape sequences with their corresponding characters. For example, $(echo -e '\x01') is replaced with “=”, $(echo -e '\x02') is replaced with “;”, and so on. The modified values are then assigned back to the same variables.
Again, how is this exactly working?
Let’s take the first line of that screenshot.
ssid=${ssid//$(echo -e '\x01')/\=}
This line of bash script is using parameter expansion to replace the first occurrence of the hex character \x01 in the variable ssid with an equal sign =, and then assigning the result to ssid.
The notation ${var//pattern/replacement} is used for global replacement of pattern with replacement in the variable var. Here, the pattern being searched for is the hex character \x01 and the replacement is the equal sign =.
The $(echo -e '\x01') is a command substitution which generates the hex character \x01 and feeds it as input to the echo command. The -e option is used to enable interpretation of backslash escapes. The result is a string with a single character \x01.
Therefore, the line replaces the first occurrence of \x01 with = in the value of ssid.
Can we use character substitution within our QR code? If so, can we force an escape of command?
After that part of the script there is a while loop function that will keep executing as long as the $ssid variable is not empty.
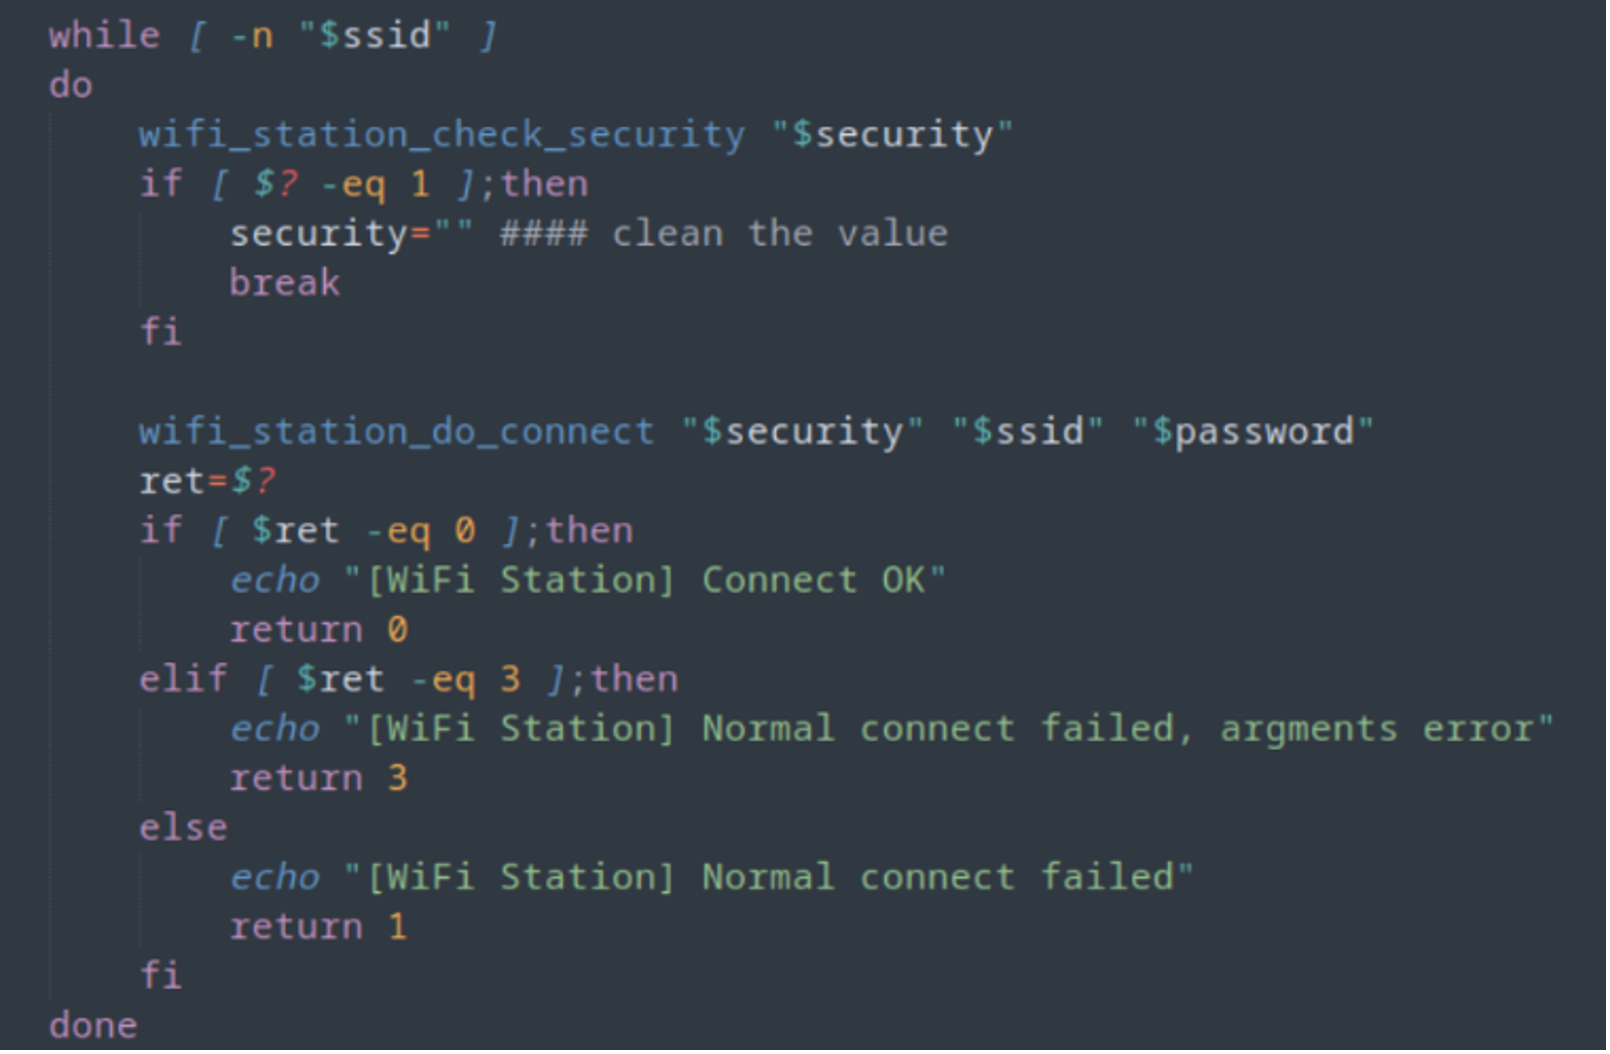
Obviously, on first startup, the $ssid is empty as it’s never been setup. Keep that in mind for later.
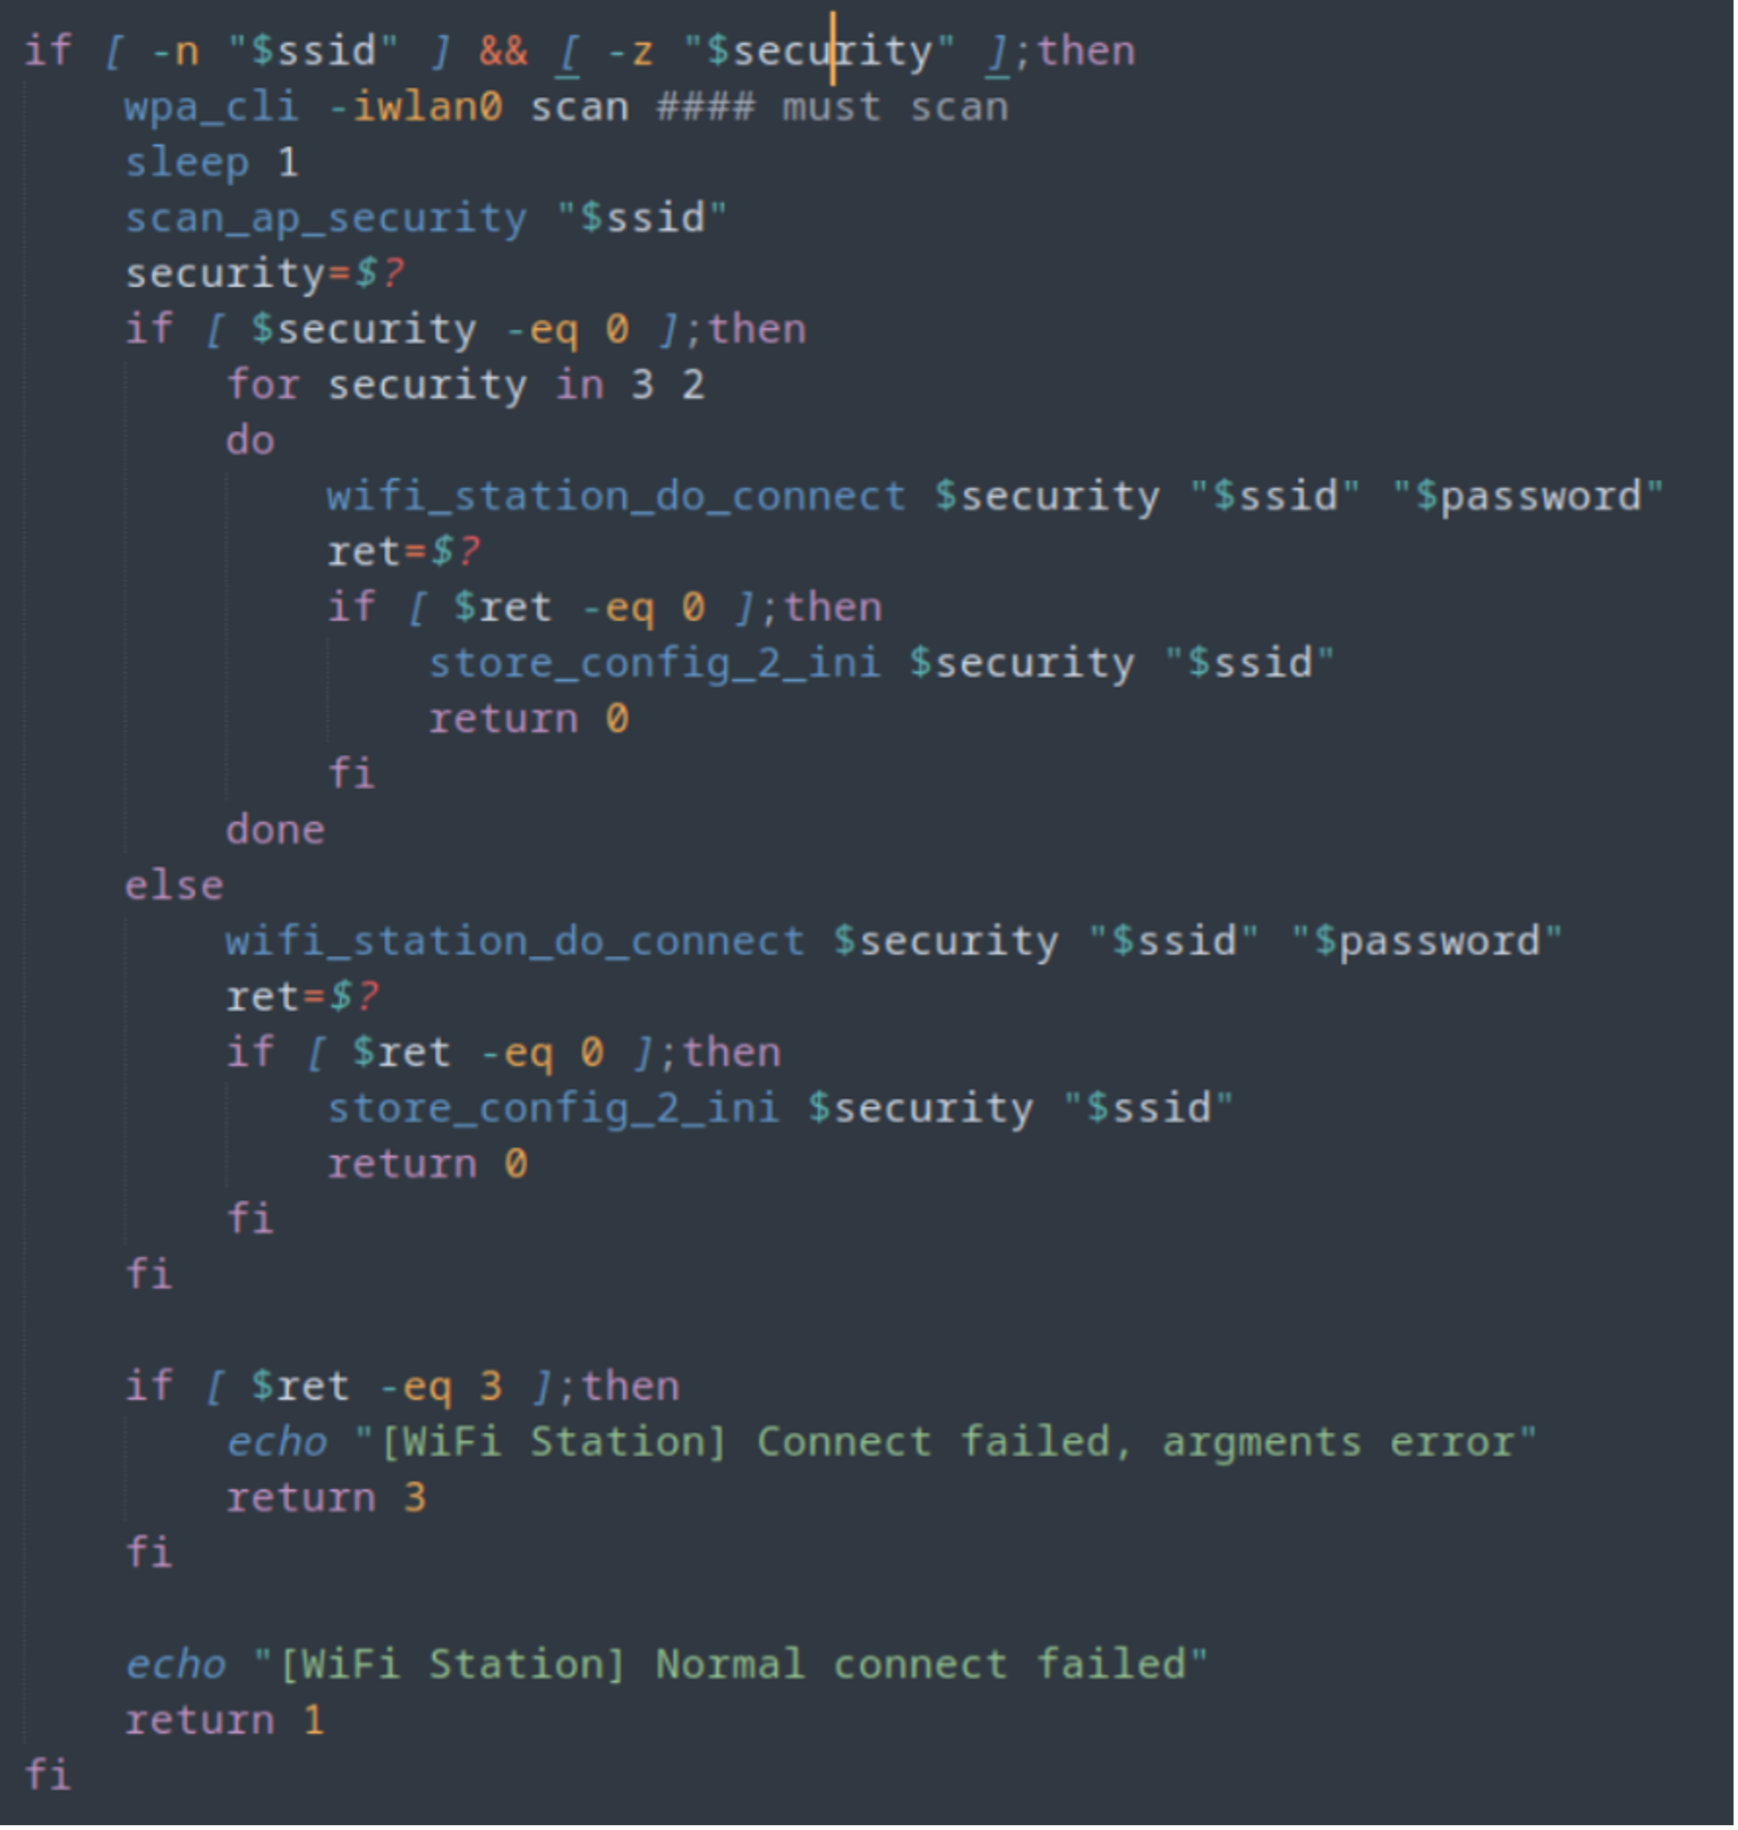
The above script starts performing a “WiFi station” connection using the provided SSID and password. It first checks if the SSID and security values are set. If the security value is empty, it performs a Wi-Fi scan using “wpa_cli” and “scan_ap_security” to determine the security protocol used by the access point with the provided SSID. The security value is then set to the detected protocol.
It then tries to connect to the access point with the SSID and password using the “wifi_station_do_connect” function and stores the connection configuration in an ini file (/etc/jffs2/anyka_cfg.ini) using “store_config_2_ini” if the connection is successful.
If the connection fails, it tries again with a different security protocol (WPA2 and WPA) if the previous protocol was not detected or was unsuccessful.
If the connection is still unsuccessful, it returns an error message indicating that the normal connection has failed. If the connection failed due to an argument error, it returns an error message indicating an argument error.
A quick look at “wifi_station_do_connect”
So literally it takes 3 variables… then does some checks, however, you can give it just two arguments.
let’s look at the connect_wpa command.

Nice and simple, just adds the SSID and PSK to the $NET_ID parameter, then tries to connect.
OK. So, I know that is a lot to follow but I’ve tried to get all this down into a chart! Maybe it will be easier to follow.
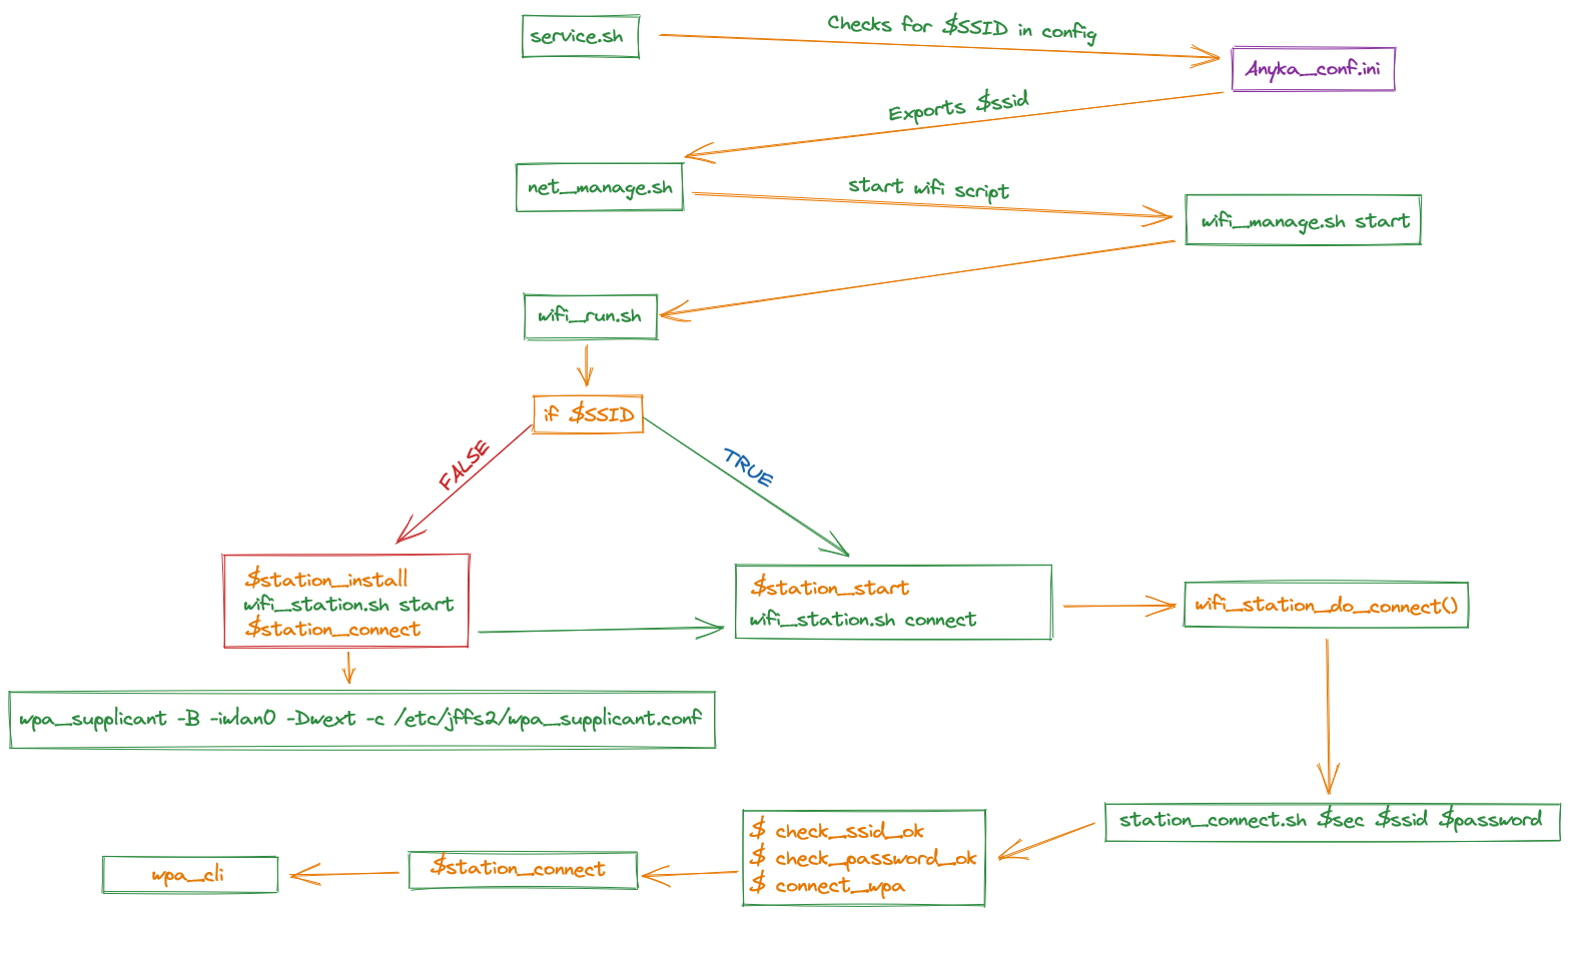
So now that we know the flow, lets look at how the camera gets the SSID and Password to connect to a Wi-Fi network.
If you remember earlier, I stated the camera has the ability to use QR codes to connect to a hotspot. Let’s see if we can find where that is happening. One clue is/was in a previous script!
Digging further into the firmware: Reverse Engineering
Pretty much, this “Anyka_IPC” binary runs the camera. So, let’s get it under the microscope!!!
First off, let’s see what protections are on the binary.

Only NX, so with a decent ROP chain, we might be able to do something.
By using IDA Pro Decompiler we can check what the binary is doing! Fortunately, we also extracted the /lib folder so with that we can link external libraries.
So again, from previous intel we can us information we saw in searching for specific things, rather than going in blind!
There are two references in this screen shot!
· “zbar_scan_qrcode”

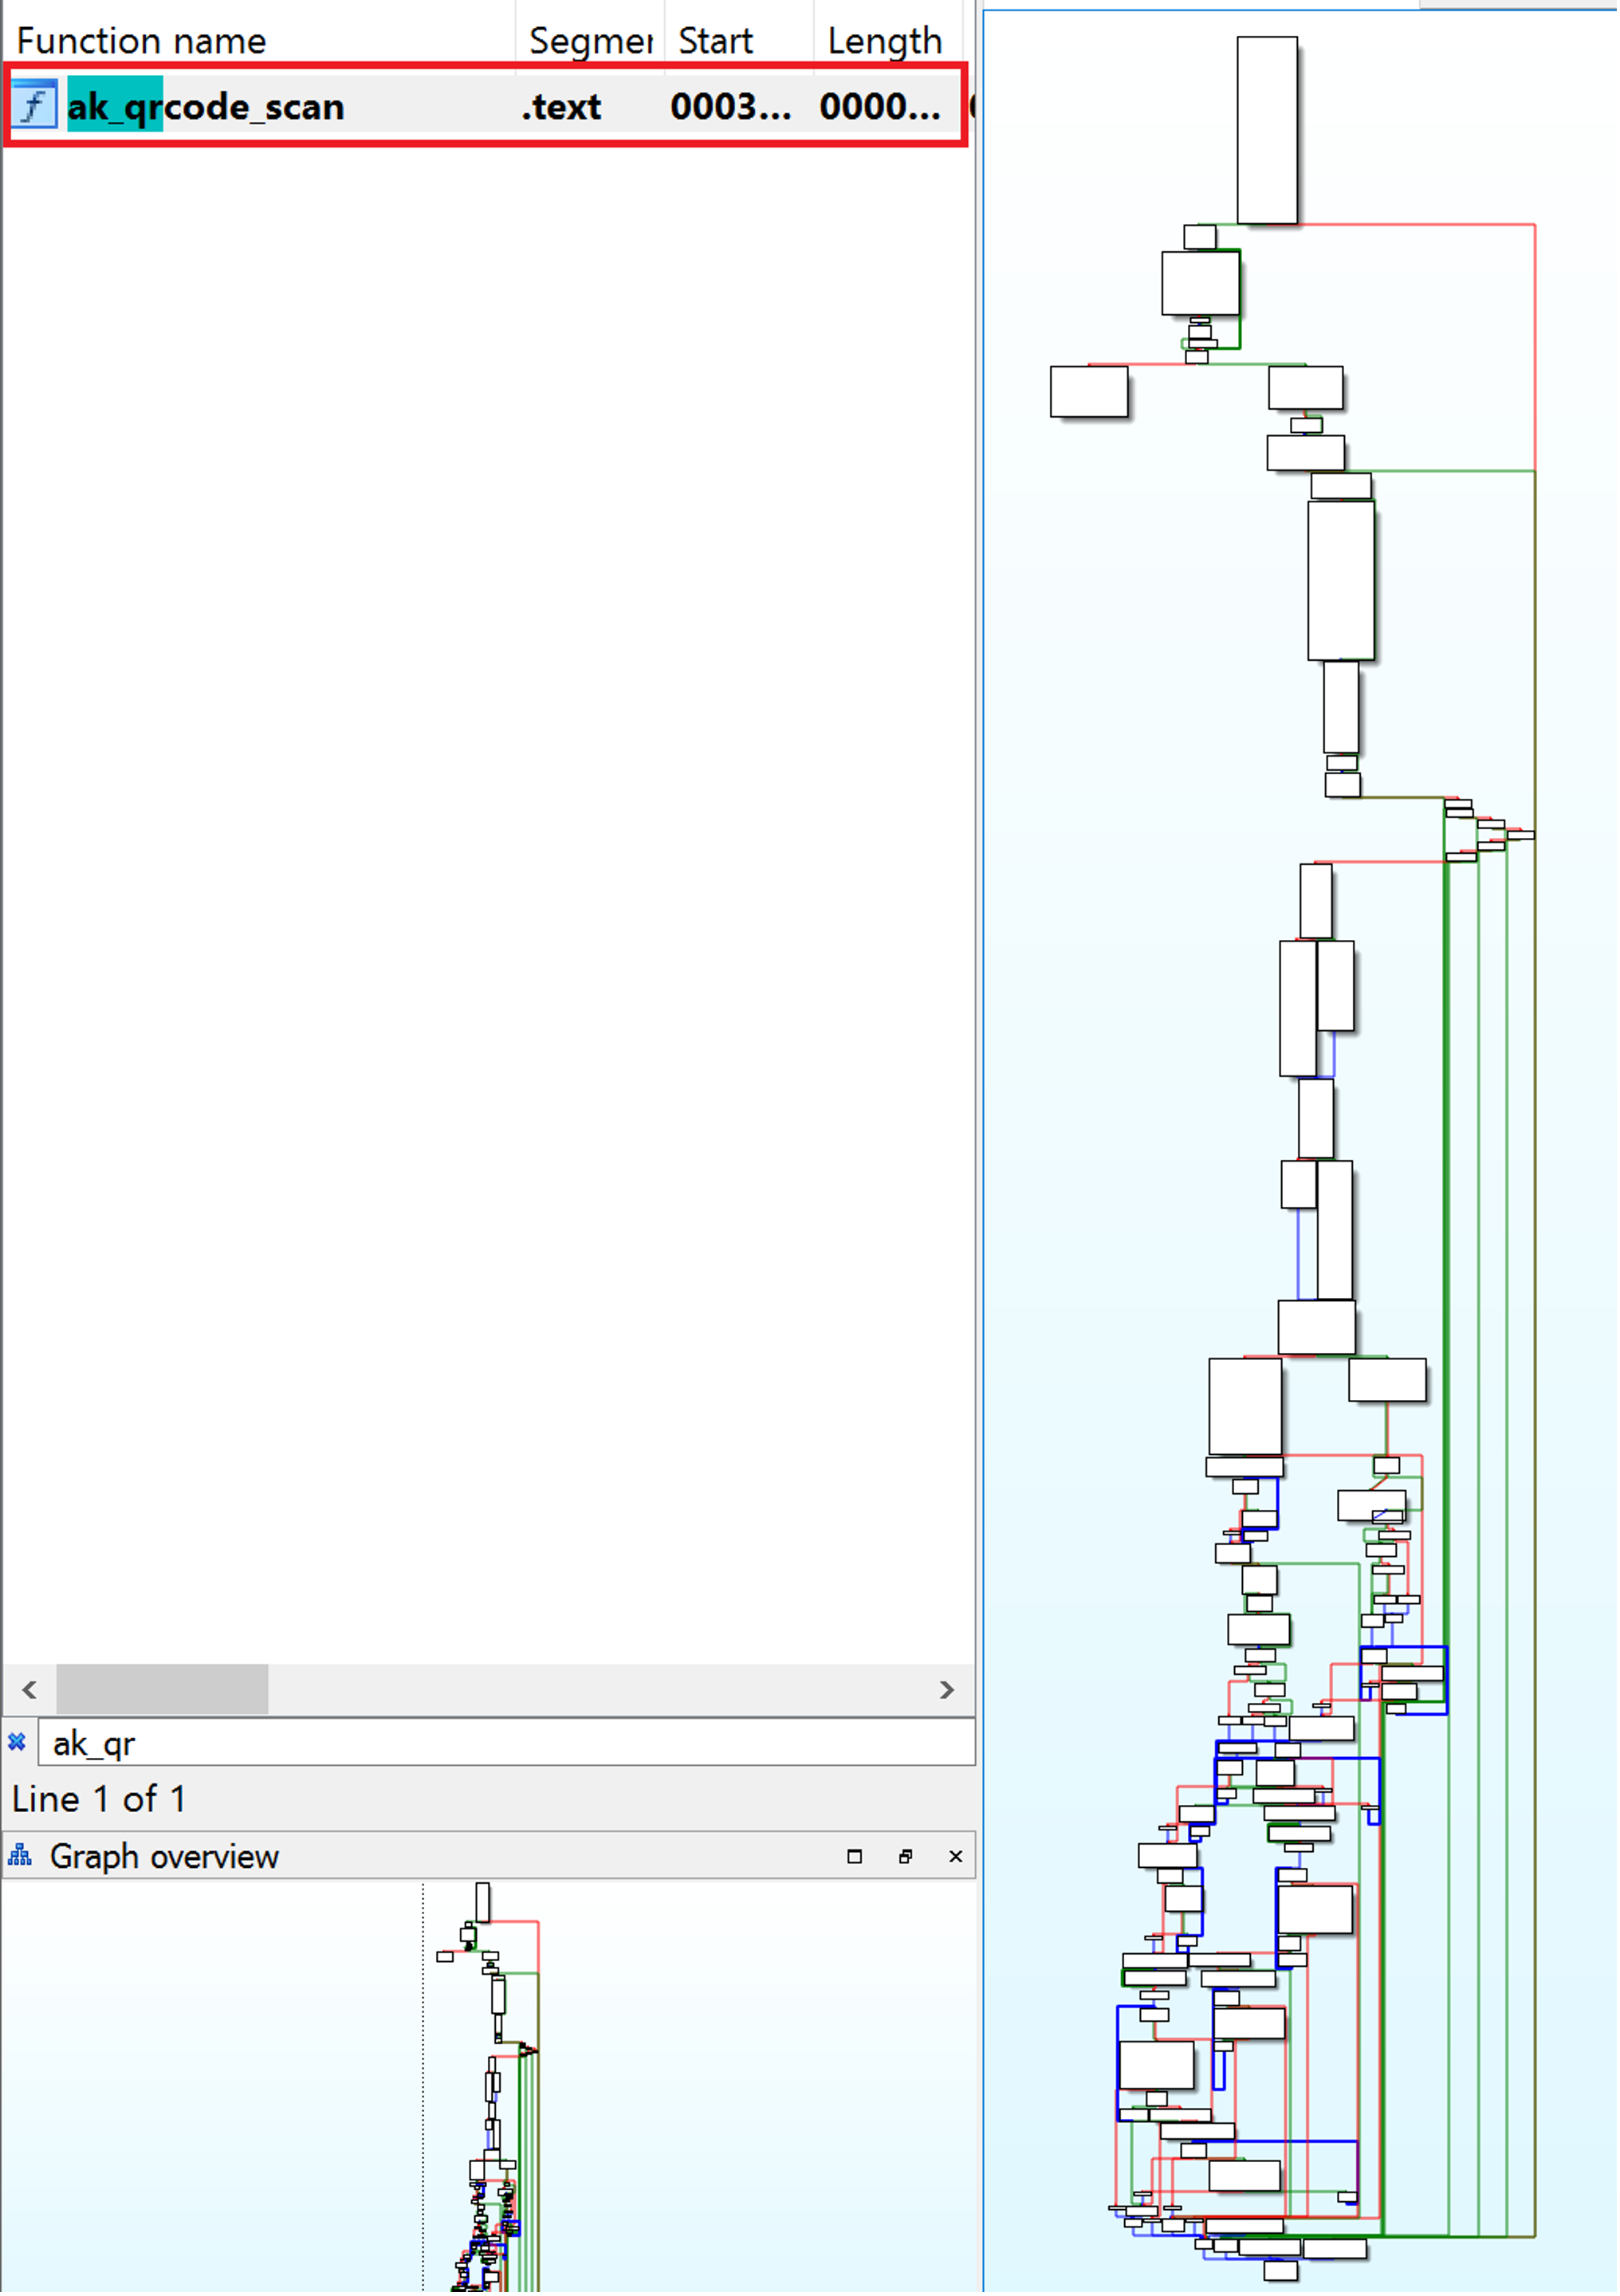
· “ak_qrcode_scan”
YAY!
Ok let’s see if we can break this down a bit more and spot any glaring issues!
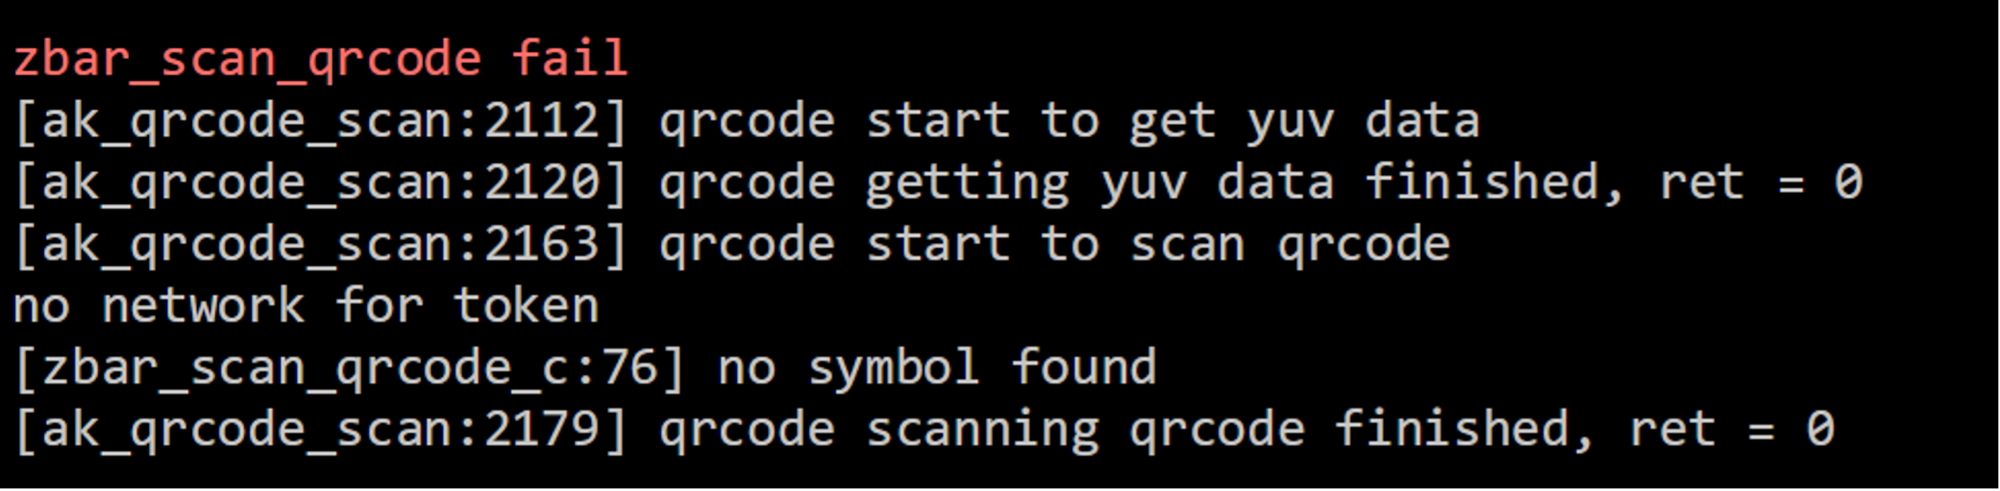
Firstly, the AK_QRCODE_SCAN is the main function, within this ZBAR_SCAN_QRCODE is called.
Here is a description of the AK_QRCODE_SCAN function.
The function takes an integer parameter need_password but does not use it in its code. The function returns an integer value that indicates the success or failure of the function.
The code initializes various variables and arrays, such as height, yuv_00, tmpbuff, and several character arrays including userregion, timezone, userid, essid, auth_key, enc_type, and qrmsg. It sets some of these arrays to zero using memset.
The function allocates memory for the yuv_00 array using the malloc function. If the allocation fails, the function returns -1. If the allocation succeeds, the function proceeds to retrieve a “YUV image” and scan the QR code from it using a loop. The loop executes up to 10 times, and it tries to get the “YUV data” using the ak_av_get_yuv function. If the function succeeds, the loop breaks. Otherwise, the function waits for 500 milliseconds using the ak_sleep_ms function before trying again. After the loop ends, the function scans the QR code using the zbar_scan_qrcode_c function, passing in the height, width, and yuv_00 array.
If that function fails, another function get_qrcode_string is called to retrieve the QR code string instead. The function then stores the QR code string in the qrmsg array and proceeds to parse it. It then checks the first character of the QR code string. If it is 'L', the function proceeds to parse the rest of the string to extract the authentication key length, ESSID length, and other data.
The function then sets the camera to access point mode using the set_ap_device_sta function and sets auth_key_len and essid_len variables. The function then returns 0 to indicate success.
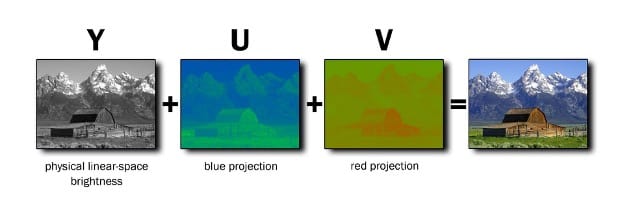
For anybody reading this, I didn’t know what a YUV image is either, so here is a visual representation of it.
One specific area of the ak_scan_qr code is below:
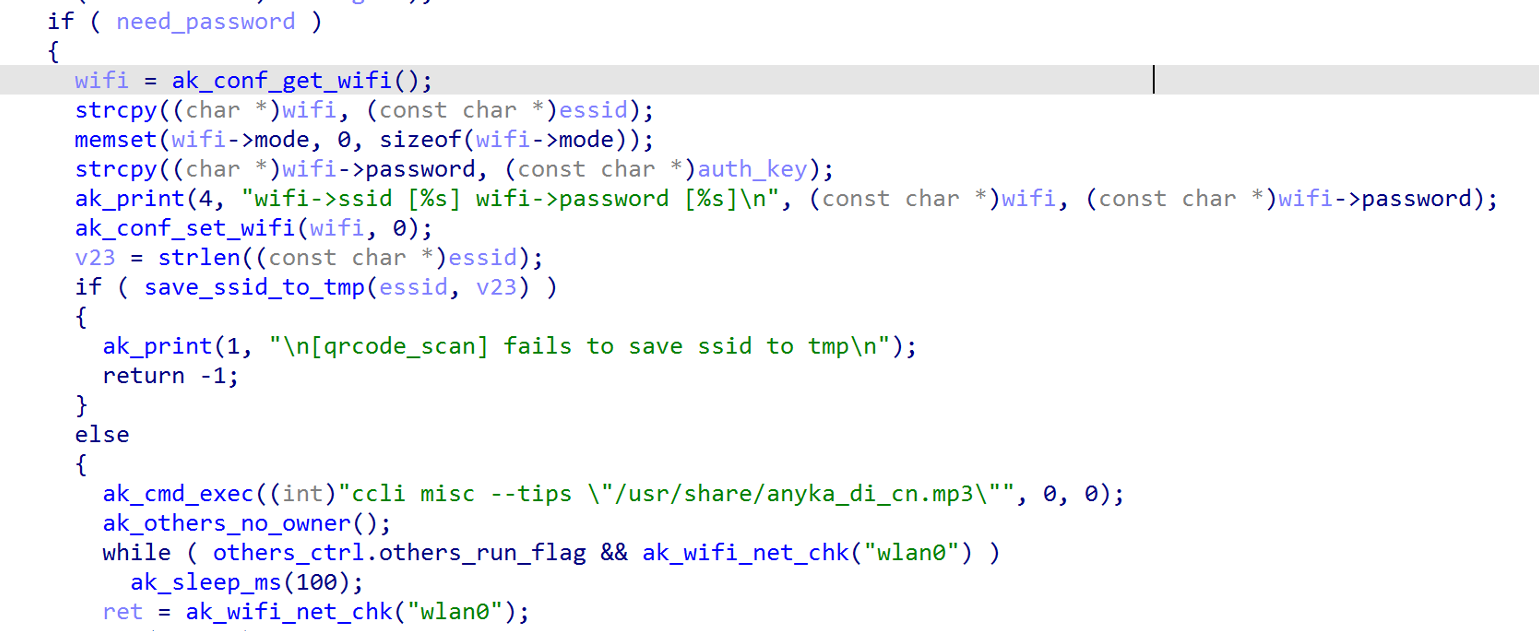
For the eagle eyed, The strcpy() function is being used to is used to copy the contents of essid to wifi and auth_key to wifi.password and is considered to be unsafe because it does not check if the destination buffer has enough space to hold the string being copied. This can lead to buffer overflows, stack, or heap buffer overflows, which may be able to be exploited to execute malicious code or crash the program.
wifi is retrieved from the function ak_conf_get_wifi()
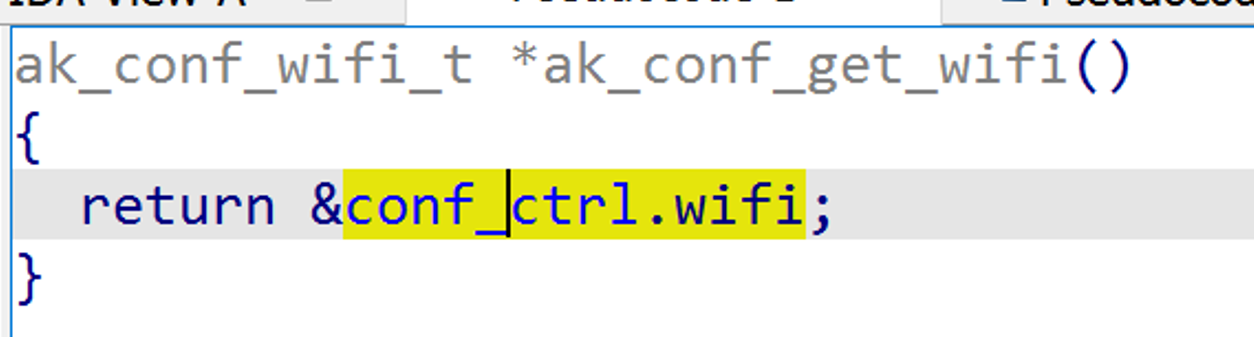
Ok so just returning something from the stack…
That’s interesting for later!
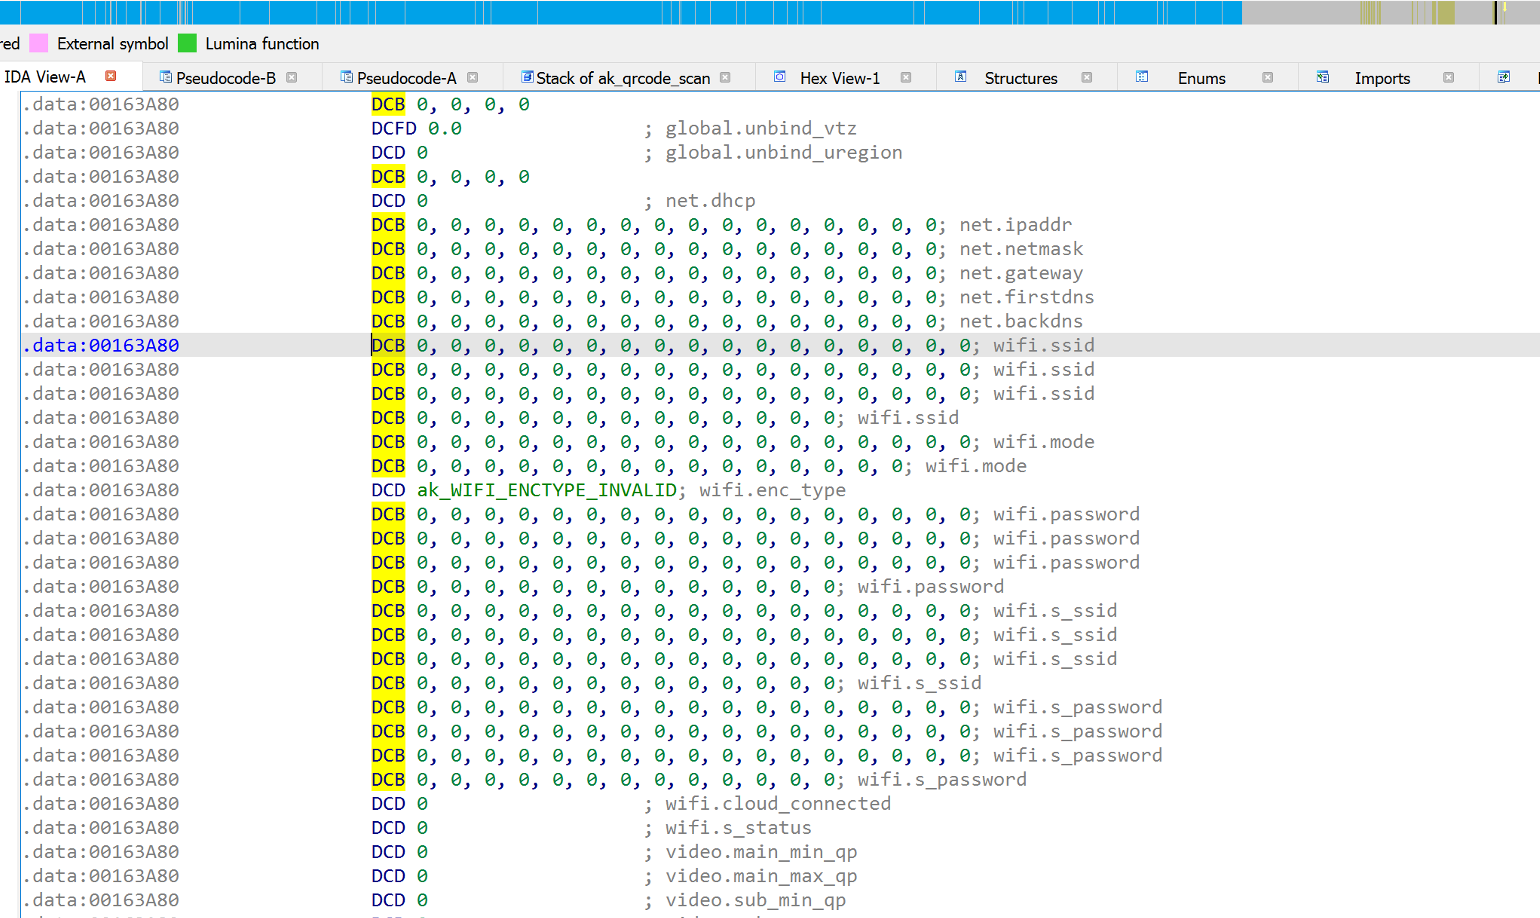
Let’s look at another function that may explain how it saves values to the anyka_conf.ini file.
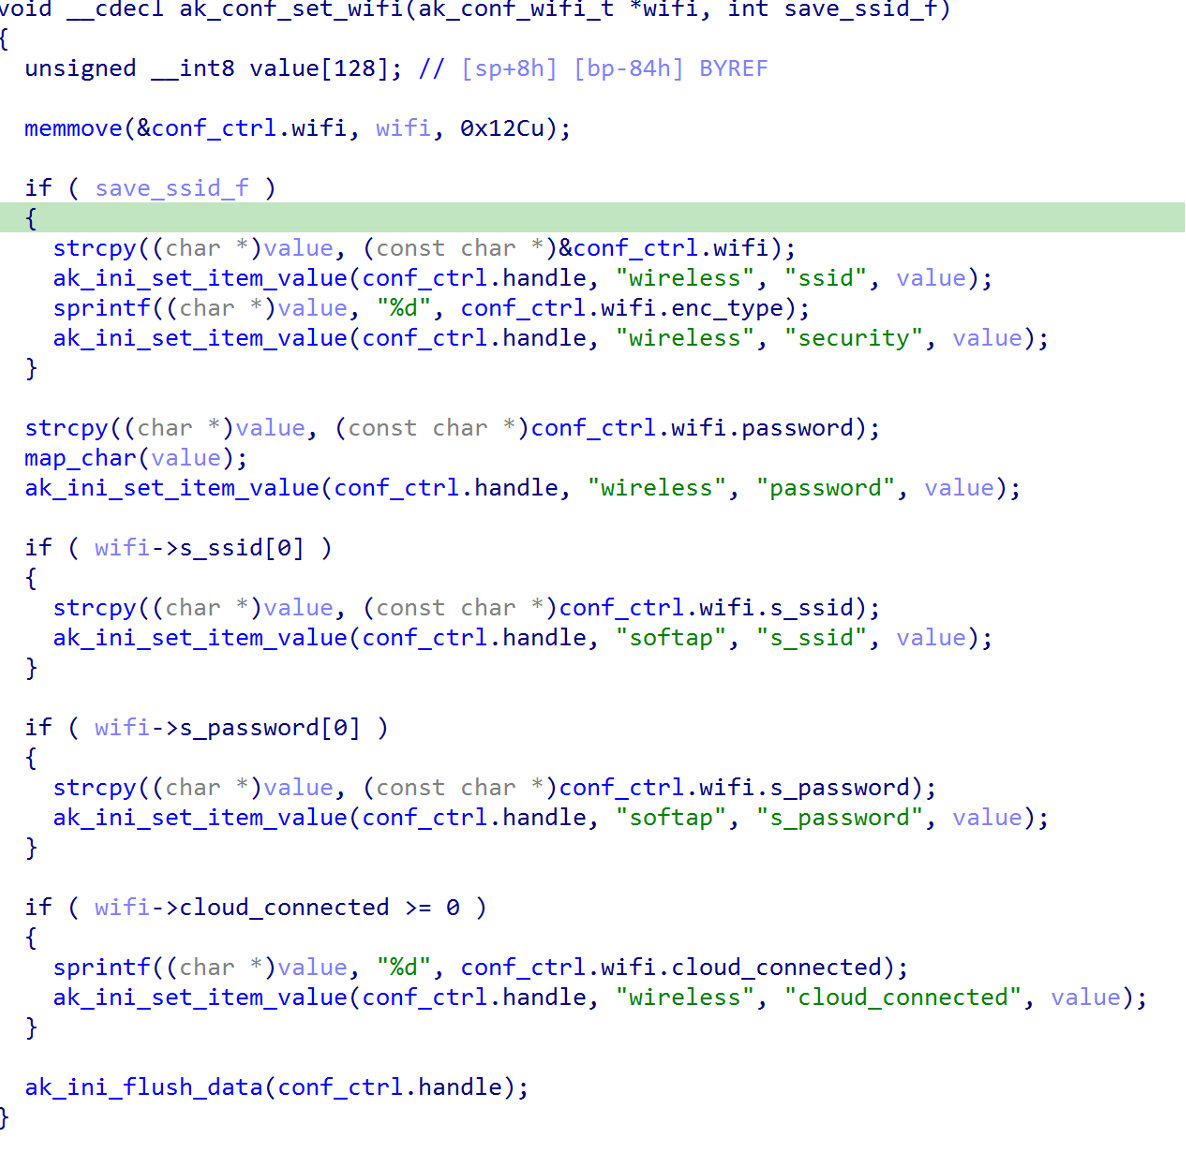
The above function first declares a local variable value of type unsigned __int8 with a size of 128 bytes and then uses memmove to copy the content of the input wifi structure to the global conf_ctrl.wifi structure (see above). The size of the wifi structure is 0x12Cu bytes, which is 300 in decimal.
If save_ssid_f is true, the function calls strcpy to copy the wireless network SSID from conf_ctrl.wifi to value, converts it to a string using ak_ini_set_item_value, and sets the ssid value in the configuration file. It then calls sprintf to convert the encryption type from conf_ctrl.wifi to a string and sets the security value in the configuration file.
The function again uses strcpy to copy the wireless network password from conf_ctrl.wifi to value, applies some mapping using map_char, and sets the password value in the configuration file.
Finally, the function checks if the s_ssid, s_password, and cloud_connected fields in the wifi structure are not empty and sets their corresponding values in the configuration file using ak_ini_set_item_value. The function then calls ak_ini_flush_data to write the changes to the configuration file.
And the last function to look at is save_ssid_to_tmp
The function creates two files (utf8_ssid and gbk_ssid) to store the provided ssid in two different encodings (UTF-8 and GBK) under /tmp/wireless/ directory. If either file already exists, it sets a flag to indicate it. If both files exist, it simply returns without doing anything.
Ok so with all that, we can see how a QR code from an app or image can be used to get the device to connect to a Wi-Fi AP and store those values on the device so it can be consistent and connect even after a reboot or power off! Obviously, this makes sense, its designed to work like that, however in my eyes, its not about that its supposed to work, its about if WE as hackers can exploit this!
Stay tuned for part 3 where things start getting interesting!